
The View All Support module lets authorized users see every internal support ticket across the company, in one place, regardless of category or who raised it.
Route: Dashboard → Support → View. This is a read-only monitoring view — it doesn’t let you change a ticket’s status, priority, or comment on it.
Who Can Use This Feature #
Subscriber Admin can always access this page and see every ticket, without needing any specific permission.
Employees can access it only if they hold the permission below.
Permission Behavior
- View All Supports
Required action: View
Grants access to this page, showing every support ticket company-wide — not just tickets you raised, and not just tickets under categories you resolve.
Without this permission (and without being the Subscriber Admin), opening this page shows no access.
This permission can be assigned directly to an employee, or to an entire team at once. See the Permissions Management guide for how to assign permissions.
What the List Shows #
Each row shows:
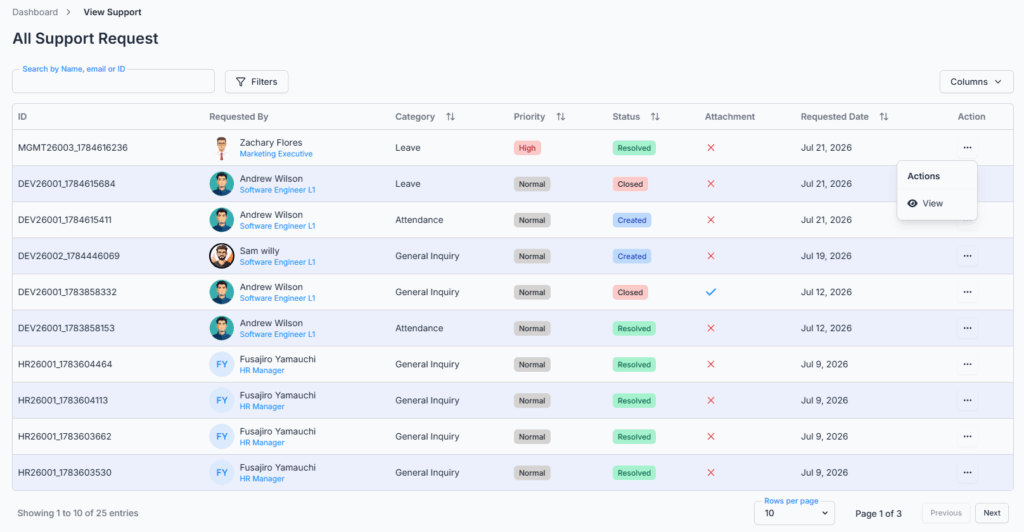
- ID — the ticket’s Request ID.
- Requested By — the employee the ticket belongs to.
- Category — the Support Category it was filed under.
- Priority — Low, Medium, or High.
- Status — Created, In Progress, Resolved, or Closed.
- Attachment — a simple checkmark or cross showing whether the ticket has any attachments, not a download link.
- Requested Date — when the ticket was submitted.
- Action — a View option only.
You can search by employee name/email/ID, and filter by Priority, Status, and a submission date range.
Good to know: clicking a column heading to sort only reorders the rows currently loaded on your screen — it doesn’t re-sort the entire company-wide list across pages.
There’s no export option on this page — it’s for on-screen review only.
Viewing a Ticket’s Details #
Clicking View opens the ticket’s full details, titled “Support Request Details” along with its Request ID. From this page, it’s organized into two tabs:
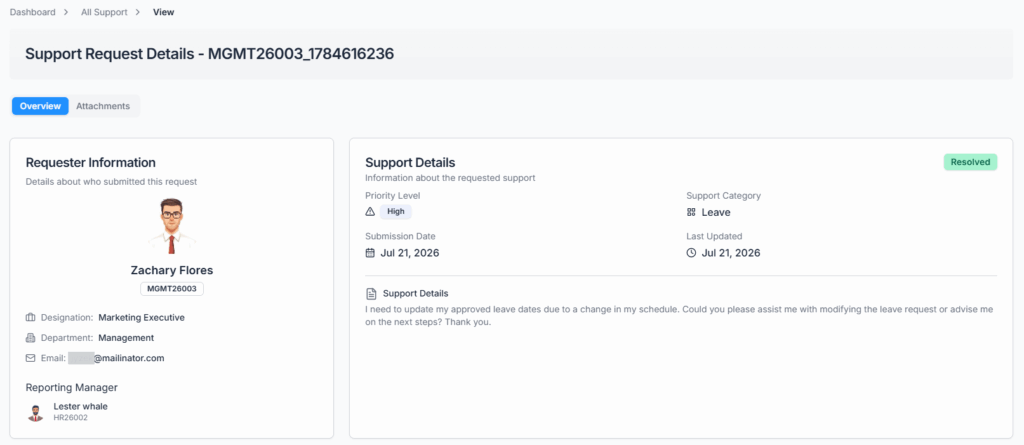
- Overview — a Requester Information card (the employee’s name, photo, employee ID, designation, department, email, and their reporting manager, or “No reporting manager assigned” if they don’t have one), plus a Support Details card showing the current Status, Priority Level, Support Category, the Submission Date, the Last Updated date, and the full issue description the employee wrote.
- Attachments — any files the employee uploaded with the ticket.
Good to know: if the requester is the Subscriber Admin rather than a regular employee, the Requester Information card shows “Admin” in place of a designation.
Good to know: opened from this page, a ticket’s details show only Overview and Attachments — there’s no Comments tab here at all, even if the ticket has comments on it. To read or add comments, that ticket needs to be opened from Support → Resolve instead (if you’re a Resolver on its category or the Subscriber Admin), or by the employee it belongs to from their own Support → Create list.
Good to know: there are no status, priority, or comment actions available from this page at all — not even for the Subscriber Admin. This page is for reviewing and reporting on tickets, not acting on them; use Support → Resolve for that.
Summary #
The View All Support module gives holders of View All Supports permission, and the Subscriber Admin, full visibility into every internal support ticket across the company. It’s strictly a monitoring view — searching, filtering, and reviewing only, with no way to act on a ticket or see its comment thread from here. For anything beyond viewing, go to Support → Resolve.