
Easily manage your company’s email configuration and templates in one place. From setting up SMTP servers to customizing your automated emails, everything is designed to keep your communication consistent, professional, and personalized.
Simple Mail Transfer Protocol (SMTP) Configuration #
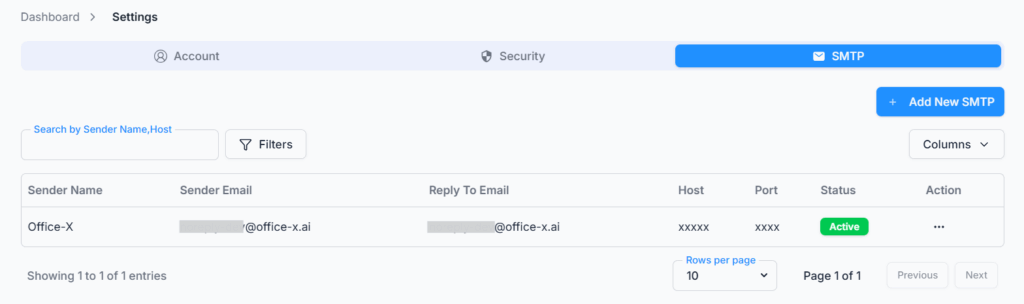
Navigate to Settings → SMTP to view all your configured SMTP accounts.
By default, your system comes with a pre-configured SMTP named “Office-X”, which is shared by every company on the platform and used as the fallback for outgoing emails whenever a company hasn’t set up (or has switched off) their own.
Note: The default SMTP cannot be edited, deactivated, or deleted — it belongs to Office-X, not to your company.
Who Can Use This Feature #
Subscriber Admin can always access this page and manage every SMTP configuration, without needing any specific permission.
Employees can access it only if they hold at least one of the permission actions below.
Permission Behavior
- SMTP Settings — Create
Lets you add a new SMTP configuration. - SMTP Settings — View
Lets you open this page and see the company’s SMTP configurations. - SMTP Settings — Update
Lets you edit an SMTP configuration and activate/inactivate it. - SMTP Settings — Delete
Lets you delete an SMTP configuration.
These four actions are granted independently — for example, an employee could be given View only, letting them see the company’s SMTP list without being able to add, edit, or remove anything.
Good to know: this permission only covers the SMTP Configuration page itself. Choosing which SMTP an Email Template sends through is a separate step on the Email Templates page, and that step is currently only available to the Subscriber Admin — an employee with full SMTP Settings access still can’t assign an SMTP to a template themselves.
This permission can be assigned directly to an employee, or to an entire team at once. See the Permissions Management guide for how to assign permissions.
SMTP List Overview:
Admins can add, edit, or delete their own SMTP configurations anytime.
Add New SMTP #
To add a new SMTP configuration, click on “Add New SMTP” and fill in the following fields (all required):
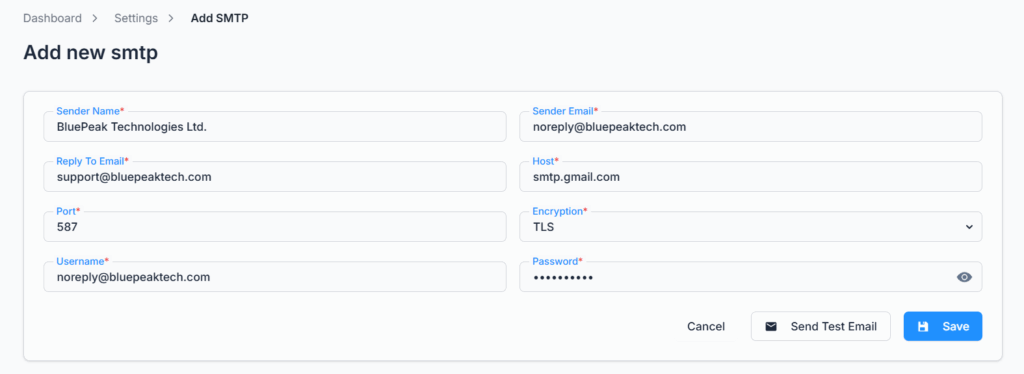
- Sender Name→ The display name that appears when recipients receive your email. (Example: Office-X or HR Department)
- Sender Email→ The email address from which messages will be sent.
- Reply-To Email→ The email where replies will be received.
- Host→ Your mail server address. (Example: smtp.gmail.com for Gmail, smtp.office365.com for Outlook)
- Port→ The port number for your SMTP server (defaults to 587, the usual port for TLS; use 465 for SSL).
- Encryption→ Choose TLS (the default), SSL, or No Encryption based on your provider’s settings.
- Username→ The username for your SMTP account (often your email address).
- Password→ Your email or App Password (for Gmail, you can generate this from your Google Account → Security → App passwords).
Once completed, you can:
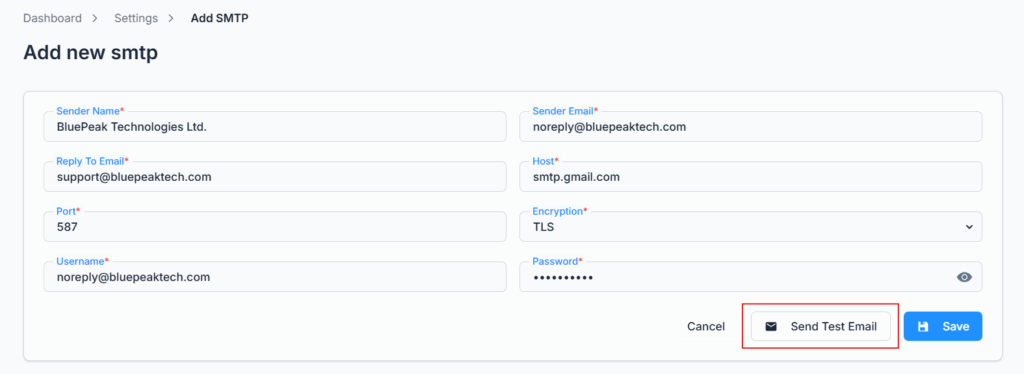
- Send Test Email – to verify that your SMTP is working properly, right from this form before you even save it.
- Save – to store the configuration.
This allows you to use your company-branded or personal mail server for all automated emails. A newly added SMTP is saved as Inactive — remember to activate it (see below) once you’re ready to use it.
Edit SMTP #
To edit an existing SMTP configuration:
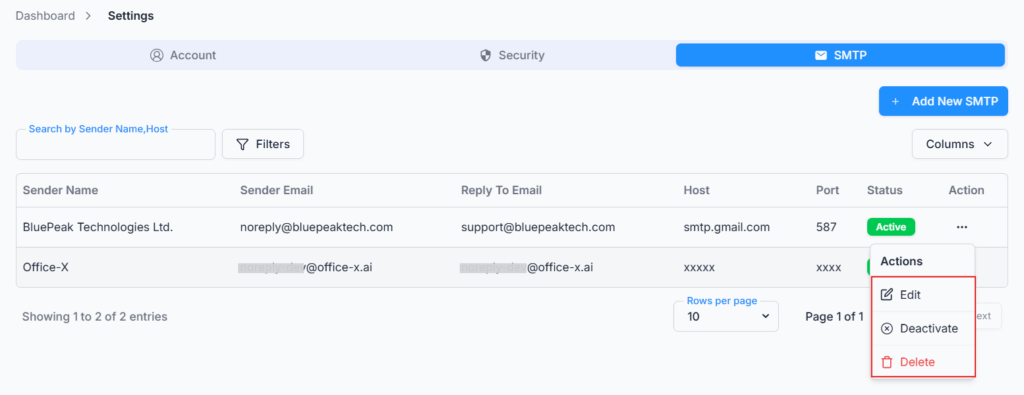
- Click Open Menu → Edit for the SMTP you want to modify.
- Update any of the fields as needed (Sender Name, Email, Host, Port, etc.).
- Save the changes to immediately apply them.
Good to know: for security, your existing password is never shown back to you on this form — the Password field always opens empty. You’ll need to re-enter it (your current password, or a new one) every time you save an edit; saving with it left blank isn’t accepted.
Changes will affect all future automated emails sent via this SMTP.
Activate / Inactivate SMTP #
You can control which SMTP accounts are available for sending emails:
- Click Open Menu → Activate/Inactivate on any SMTP.
- Inactivating an SMTP keeps its configuration saved but prevents it from sending emails.
- Inactive SMTPs do not show up when selecting an SMTP while creating an email template.
This is useful when switching mail servers or testing new configurations without deleting old ones.
How Office-X picks which SMTP to actually use: each Email Template (see the Email Templates guide) is wired to a specific SMTP account. When that template sends an email, Office-X uses its assigned SMTP as long as it’s Active. If the assigned SMTP is missing or Inactive, Office-X looks for any other Active SMTP it can use instead — either one of your company’s own Active SMTPs or the shared Office-X default — and sends through whichever one it finds; there’s no guaranteed order between the two, so it isn’t something you can predict or control from this screen. In practice there’s almost always at least the shared Office-X default available, since that one can’t be deactivated — so activating or deactivating an SMTP here can change which emails go out and from where, even without editing any template.
Note: An SMTP configuration that’s currently assigned to any email template can’t be deleted — you’ll see a message telling you it’s in use. Reassign or remove it from that template first.