Skip to content
Office-X
Partners Pricing Add-ons FAQ Help Center
Sign in Start free trial →
Features & Solutions

Everything You Need to
Make Your Workplace Smarter

Office-X brings your people, payroll, clients, and daily operations together in one secure workspace.

Employee Management
Onboarding & Performance Manage and track growth
Attendance & OT IP-locked check in + overtime
Time off / Leave Requests, balances & approvals
Internal Support Tickets & helpdesk
Payroll Paystubs & Tax statements
Work Shifts Schedule Create and manage rosters
Business Management
CRM Manage leads, clients & sales
Estimate & Agreements Quotation + e-sign docs.
Web & AI Phone Bookings Automated scheduling
Activity Log Who did what, when & where
Permissions & Approvals Multi-level approval flows
Business Management
Task Management Assign & track work
Asset & Incident Tracking Track assets & report incidents
Bill, Travel & Purchase Approve & manage expenses
Holiday Calendar Company-wide holidays
Email Templates & SMTP Branded emails & delivery
Employee Management
Onboarding & Performance Attendance & OT Time off / Leave Internal Support Payroll Work Shifts Schedule
Business Management
CRM Estimate & Agreements Web & AI Phone Bookings Activity Log Permissions & Approval Flow Task Management Asset & Incident Tracking Bill, Travel & Purchase Holiday Calendar Email Templates & SMTP
Partners Pricing Add-ons FAQ Help Center
Sign in Start free trial

Getting Started

1
  • Getting Started with Office-X

Subscription & Billing

1
  • How Seats Work in Office-X

Features & Modules

80
  • Overview
  • Business Management
    • Company
    • Billing & Payment
    • Payroll Configuration
    • Business Support
  • Employees Module
    • Employee List
    • Adding a New Employee
    • View Employee Details
    • Edit an Employee
    • Reset Password
    • Work Hours/Shift Hours
    • Change Status
    • Assign/Unassign Seat
    • Opening Balance
    • Assign Work Days
    • Visual Guide
  • Privacy & Security
    • Security
  • Performance Management
    • Performance Management
  • Work Shifts
    • Work Shifts
  • Tasks
    • Schedule
    • History
    • Customers
  • Holidays Calendar
    • Calendar
  • Attendance Management
    • Attendance Records
    • Individual Attendance Summary
    • Overall Attendance Summary
    • Visual Guide
  • Leave Management
    • Create Leave
    • Approve & Reject Leave
    • Cancel Approved Leave
    • View All Leaves
    • Visual Guide
  • Bill Management
    • Create Bill
    • Approve & Reject Bill
    • View All Bills
    • Visual Guide
  • Travel Requests
    • Create Travel Request
    • Approve & Reject Travel Request
    • View All Travel Requests
    • Visual Guide
  • Purchase Requests
    • Create Purchase Request
    • Approve & Reject Purchase Requests
    • View All Purchase Requests
    • Visual Guide
  • Payroll (Bangladesh)
    • Business → Payroll Configuration
    • Payroll Management
    • Income and Tax Statement
    • Visual Guide
  • Incident Report
    • Incident Report
  • Asset Tracking
    • Asset Tracking
  • Admin Module
    • Department
    • Designation
    • Pay Type
    • Employment Status
    • Leave Types
    • Benefits
    • Expense Category
    • Teams
    • Forms
    • Events & Announcements
    • Incident Configuration
    • IP Configuration
    • Currency
    • Support Categories
    • Integrations
  • CRM
    • Clients
    • Items
    • Estimates
    • Docs
    • Agreements
    • Bookings
  • Support
    • Create Support Request
    • Resolve Support Requests
    • View All Support
    • Visual Guide
  • Activity Logs
    • Activity Logs
  • Permissions & Approval Flows
    • Permissions Management
    • Approval Flows
  • SMTP & Email Templates
    • SMTP Config
    • Email Templates
View Categories
  • Home
  • Docs
  • Features & Modules
  • Employees Module
  • Assign Work Days

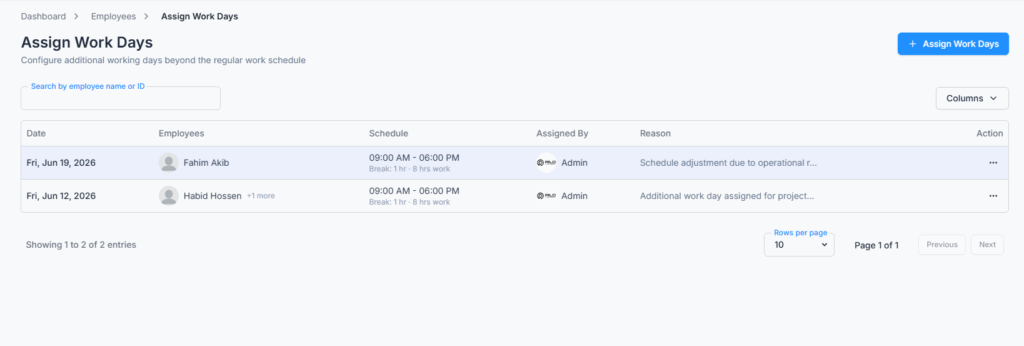
Assign Work Days

A Workday Assignment is used when an employee needs to work on a day that is outside their regular schedule. For example, a Saturday shipment, month-end closing, or holiday support shift. It does not replace the employee’s regular work schedule. It applies only to that specific date.

Each workday assignment holds:

  • The employees it applies to (picked one by one, or through a team)
  • The date
  • Start time and end time
  • Break hours
  • A reason (optional)
  • Who assigned it, and when

Office-X works out the day’s working hours for you: end time − start time − break.

Where to Find It #

  1. Log in to Office-X.
  2. Go to Dashboard → Employees.
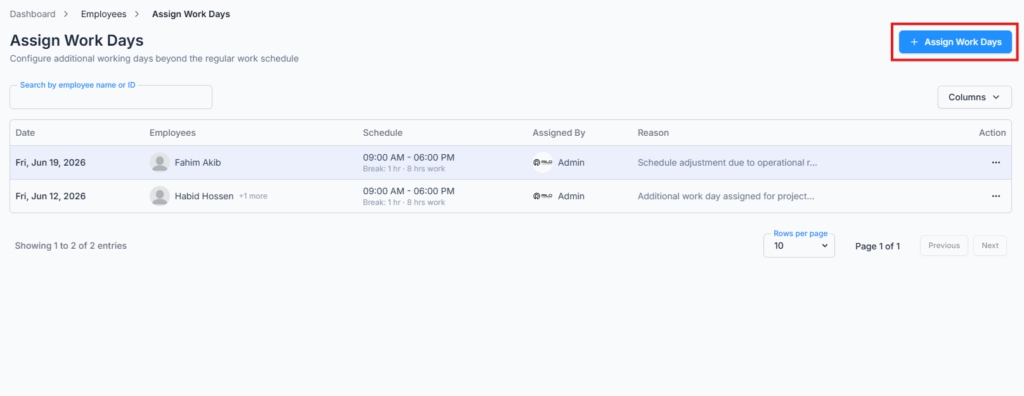
  3. Click the Assign Work Days button at the top of the page.

The page address is /dashboard/employees/assign-work-days.

If you don’t have any Assign Work Days permission, the button isn’t shown on the Employees page — and if you open the address directly, Office-X shows a no-access screen instead of the table.

Who Can Use This Feature #

Subscriber Admin — full access to everything here, with no permission needed.

Employees with permission — set from Admin → Permissions, on the Employee Permission tab, in the Employee group. There are two separate permissions:

  • Assign Work Days (For All) — the whole company
  • Assign Work Days (For Subordinate) — the people who report to them

Each one carries four separate actions — View, Create, Update and Delete — so you can, for example, give someone View and Create without Update or Delete. Any one of the eight is enough to open the page; the buttons inside then follow what you granted.

Permission behaviour

In this section, “you” means the Subscriber Admin doing the granting, and “they” means the employee receiving it.

PermissionWho they can assign work toWhich assignments they see in the table
Assign Work Days (For All) with Create enabledAny eligible employee, and any team, in the companyEvery assignment in the company
Assign Work Days (For All) with View onlyTheir reporting chain, and themselvesAssignments they created, plus any assignment involving someone in their reporting chain
Assign Work Days (For Subordinate)Their reporting chain, and themselvesAssignments they created, plus any assignment involving someone in their reporting chain

Good to know:

  • What “reporting chain” means: It includes everyone below the employee in the reporting structure—direct reports, their reports, and so on. The same list is used for both viewing and creating assignments. Their own name is included too, so a manager can create a work day assignment for themselves.
  • “For All” needs Create permission: The For All permission gives access to the company-wide view only when Create is also enabled. With View alone, the person is limited to their own reporting chain, just like For Subordinate. So, to let someone see everyone’s assignments, enable Create as well.

This permission can be assigned directly to an employee, or to an entire team at once (so everyone on that team inherits it). See the Permissions Management guide for how to assign permissions.

Before You Start #

A few rules decide what you can and can’t do here. Knowing them first saves a lot of guessing:

  • The employee needs an assigned seat. Employees without a seat don’t appear in the picker at all. Neither do employees who have a leaving date set on their profile.
  • The date must be today or later. You can’t record a workday that has already passed.
  • Times are picked from a list of full hours. Start Time and End Time are dropdowns running 01:00 AM through 12:00 AM, on the hour.
  • One assignment per employee per date.
  • Assigning a day has real effects on attendance, leave and payroll. Read What Happens After You Assign below before you assign a weekend or a holiday.

Create a Work Day Assignment #

  1. Go to Dashboard → Employees → Assign Work Days.
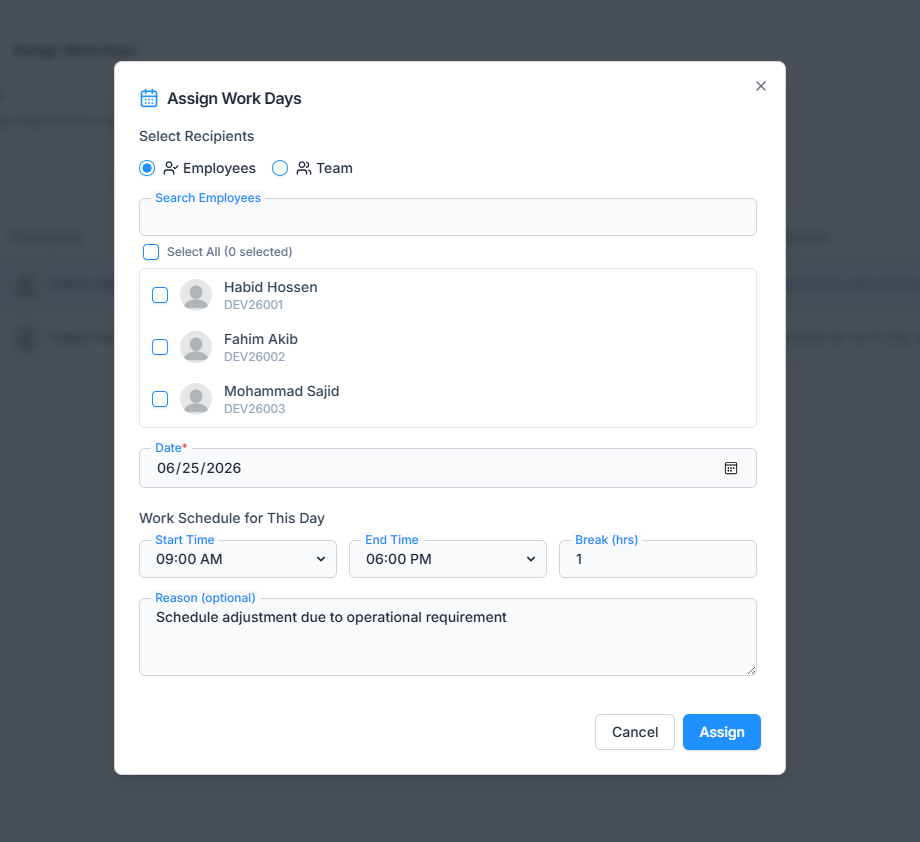
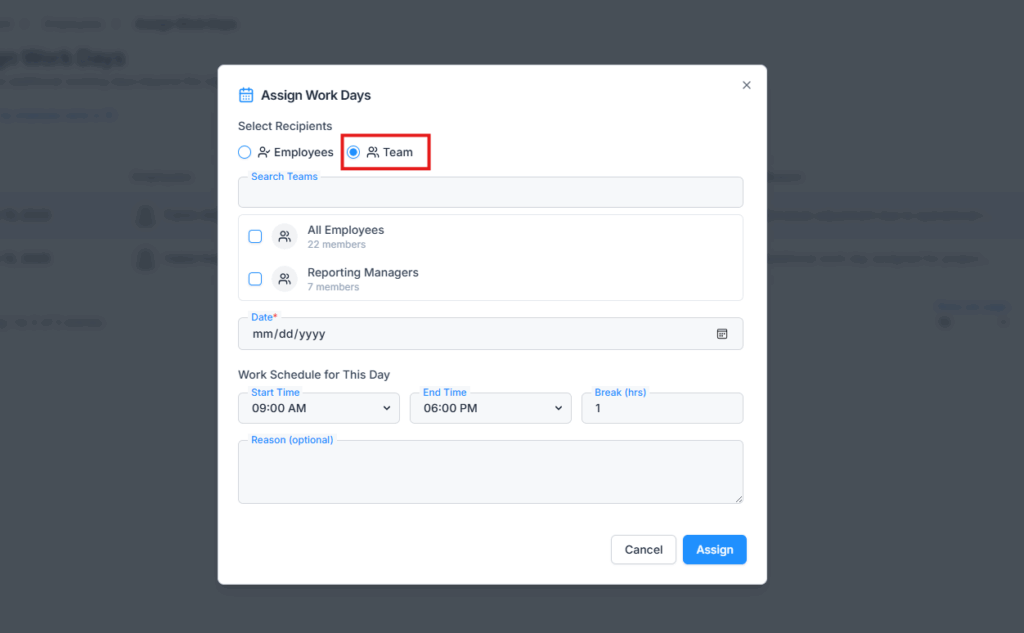
  2. Click the Assign Work Days button at the top right. A pop-up window (a modal) opens — you don’t leave the page.
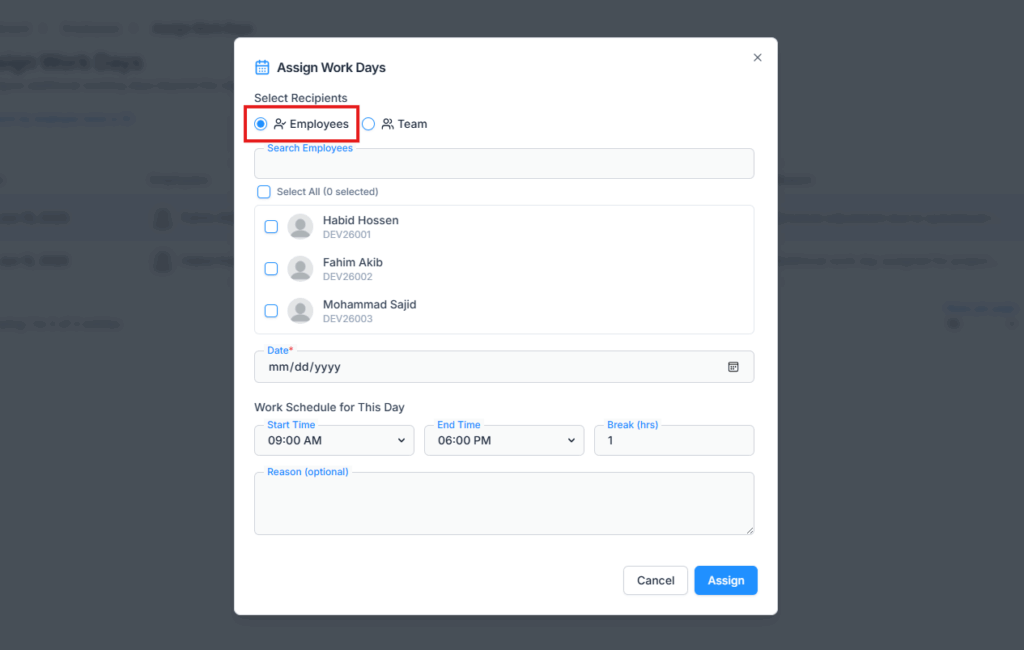
  3. Under Select Recipients, choose Employees or Team. It’s one or the other, not both — switching between them clears whatever you had picked.
  4. Pick the people (any number of them) or the team (one team at a time).
  5. Choose the Date. Earlier dates are blocked in the calendar.
  6. Choose the Start Time and End Time. They start at 09:00 AM and 06:00 PM until you change them.
  7. Set Break (hrs). It starts at 1 and moves in steps of half an hour, so 0, 0.5, 1, 1.5 and so on are all fine.
  8. Add a Reason if you want to. It’s optional — but it’s what the employee sees in their notification, so it’s worth writing.
  9. Click Assign.

You’ll see “Work assignment created successfully.” and the new row appears at the top of the table.

Night shifts that end the next morning

An assignment can run past midnight. To set a shift from 7:00 PM to 7:00 AM the following morning, just choose Start Time 7:00 PM and End Time 7:00 AM — you don’t touch the date. Office-X understands that the end time falls on the next day and works out 12 hours, minus your break.

Wherever an overnight assignment is shown, it’s marked for you: a Next day badge in the table, and (next day) beside the time in the details window.

If you’re assigning today

Pick today’s date and the start times that have already gone by are greyed out — you can only start the day from an hour that is still ahead. If the whole working day is already over, assign tomorrow instead.

Assigning to Employees #

With Employees selected you get a search box and a tick-list. Each row shows the person’s name, employee ID and designation, and shift workers carry a Shift badge so you can tell them apart.

How the list behaves depends on your permission:

  • Company-wide access (Subscriber Admin, or For All with Create) — the list starts empty and says “Type above to search employee”. Type at least one letter of a name, or part of an employee ID, and matching people appear. Each search brings back up to 50 people.
  • Reporting-chain access (For Subordinate, or For All with View only) — your whole chain loads straight away, with your own name in it. The search box just narrows down the list that’s already there.

Select All ticks everyone currently in the list, and the counter beside it — Select All (4 selected) — always tells you how many you have.

Good to know: on company-wide access, Select All only ticks the people your current search brought back not everyone in the company.

Assigning to a Team #

With Team selected you pick one team, and everyone in it gets the assignment. Picking a second team replaces the first — if you need two teams on the same day, create two assignments.

  • Company-wide access — type at least two letters of the team name to search. Until then the list says “Type above to search team”.
  • Reporting-chain access — you only see teams that contain at least one person from your chain, and the list is ready as soon as you open it.

Each row shows the team name and how many people it holds. If a team mixes your chain with other people, the row spells out what you’ll actually get — for example “3 of 12 members assignable” — and only those 3 receive the assignment.

Good to know: teams set up as “all employees” or “all reporting managers” are worked out live at the moment you assign, so they always match today’s staff list rather than an old saved list of names.

What Happens After You Assign #

This is the part worth reading before you assign a weekend or a holiday. An assignment isn’t just a note — the day genuinely becomes a working day for that employee.

  • The employee is told. Everyone on the assignment gets an in-app notification titled “Work Day Assigned” with the date, the start and end time, and your reason if you wrote one. Clicking it opens their Attendance page.
  • It appears on their own dashboard. An Assigned Work Days card lists their upcoming assigned days — this month plus the next two months. Days that have already passed drop off the card, so it always reads as a to-do list.
  • It becomes an expected working day. On their Att. Overview tab, the assignment’s hours are added to Expected Working Hours and Expected Working Days for that month.
  • Not turning up counts as absent. Because the day is now expected, an employee who doesn’t check in on an assigned day is counted absent for it — and if you run payroll through Office-X, the absent deduction follows. This is the single most important thing to know about this feature.
  • Leave on that day is real leave. A weekend or holiday is normally skipped when leave days are counted. Once it has an assignment it counts — and it counts using the assignment’s hours, not the employee’s usual weekday hours. So if you assign a Saturday and the employee then takes leave that Saturday, their leave balance is used.

Good to know:

  • Weekend or holiday assignments: If you assign a work day on a normal weekend or holiday, Office-X treats it as a regular working day for payroll (if supported). It will not be paid as rest-day or holiday overtime.
  • If the assignment is no longer needed: Delete the assignment instead of leaving it in place. As long as it exists, the assigned day continues to affect attendance as expected, including counting an absence against the employee.

View Work Assignment Details #

  1. Open the Assign Work Days page.
  2. Find the assignment in the table.
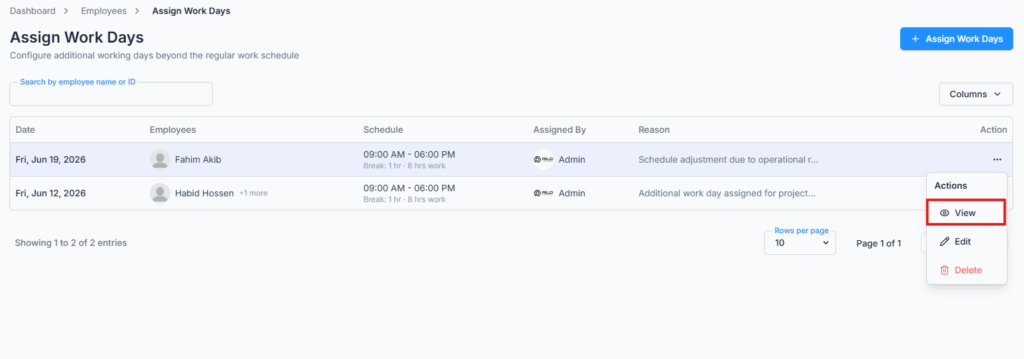
  3. Click the action menu at the end of the row.
  4. Click View.

The Work Assignment Details window shows the full date, the work schedule (start–end time, with (next day) for an overnight shift, and the total working hours), the break, every assigned employee with a headcount and their Shift badges, who assigned it, and the reason if one was given.

Edit a Work Day Assignment #

  1. Open the Assign Work Days page.
  2. Find the assignment in the table.
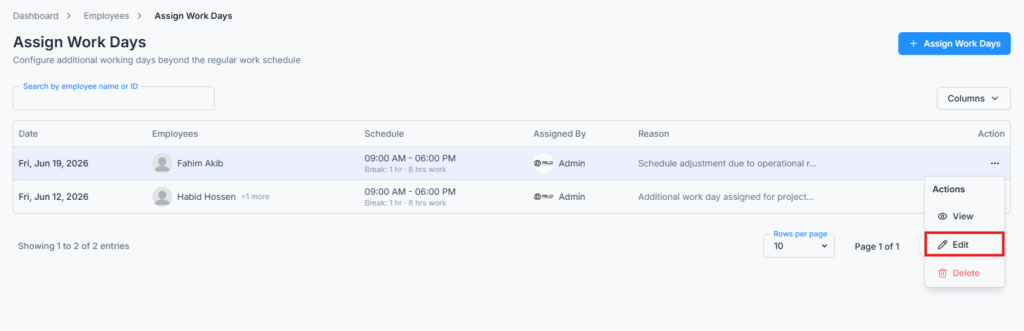
  3. Click the action menu and choose Edit.
  4. The Edit Work Assignment window opens with everything already filled in.
  5. Change whatever needs to change — people, date, times, break or reason.
  6. Click Save Changes.

You’ll see “Work assignment updated successfully.” The new details flow through to the table, the employee’s Work Hours tab and their Att. Overview totals, and everyone on the assignment gets an in-app notification titled “Work Assignment Updated” with the new date, times and reason.

The Edit and Delete Deadline #

Edit and Delete are available only until the assignment’s date and start time arrive. A work day set for Saturday 09:00 AM can be changed right up to Saturday 08:59 AM. After that:

  • Edit and Delete disappear from that row’s action menu.
  • View stays, so the record is never lost.

This applies to the Subscriber Admin and to both Assign Work Days permissions equally — once a work day has started, nobody can change or remove it.

Delete a Work Day Assignment #

  1. Open the Assign Work Days page.
  2. Find the assignment in the table.
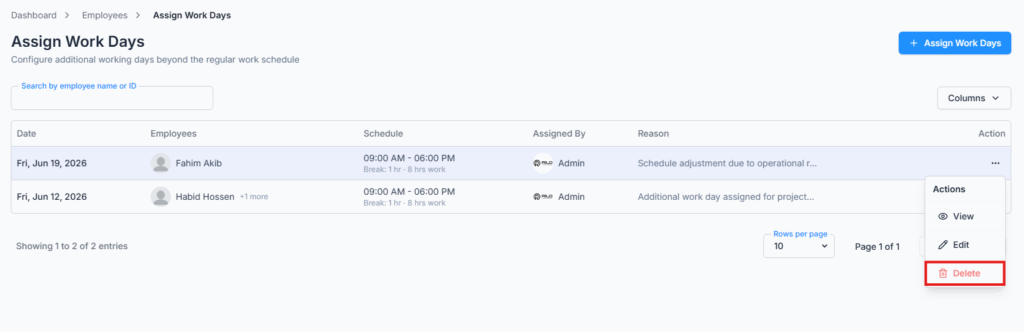
  3. Click the action menu and choose Delete.
  4. Confirm on the Confirm Deletion box — it warns you that “This action cannot be undone. The work assignment will be permanently deleted.”

You’ll see “Work assignment deleted successfully.” The assignment leaves the table, the employee’s Work Hours tab, their Att. Overview totals and their dashboard card, and the day goes back to being an ordinary weekend, holiday or off day.

Good to know: Deleting a workday assignment does not send a notification to the affected employees. If employees were already told to work that day, make sure you let them know about the change—Office-X won’t notify them automatically. The deletion is still recorded in the Activity Log.

Finding the Assignment You Need #

The table is sorted newest date first. Three tools sit above it:

  • Search by employee name or ID — searches your whole list, not just the page you’re looking at. It matches first name, last name and employee ID, and it works on part of a word, so “rah” finds Rahim.
  • Filters — a date range. Fill in both From Date and To Date; one on its own gives you “Please select both start and end dates.”, and a From later than the To gives you “Start date cannot be after end date.” Once applied, the range shows as a badge under the toolbar, and Clear removes it.
  • Columns — hide any column you don’t need: Date, Employees, Schedule, Assigned By or Reason. The Action column always stays.

At the bottom you can show 10, 20 or 30 rows per page.

What the columns show

ColumnWhat you see
DateThe assigned day, with its weekday — for example Sat, Aug 30, 2026.
EmployeesThe first employee’s photo and name, then +2 more for the rest. Shift workers carry a Shift badge. Open View for the full list.
ScheduleStart and end time, a Next day badge for an overnight shift, and underneath it Break: 1 hr · 8 hrs work.
Assigned ByWho created the assignment.
ReasonThe reason, shortened to about 40 characters. Hover over it to read the whole thing.
ActionView — plus Edit and Delete while the deadline hasn’t passed and you hold those permissions.

Where Assigned Work Days Appear on the Employee’s Record #

You don’t have to come back to this page to check someone’s assigned days. They sit on the employee’s own record in two places:

  • View Details → Work Hours tab — an Assigned Work Days card under the weekly schedule, described as “Additional work days beyond the regular schedule”. The card only appears when that employee actually has an assignment.
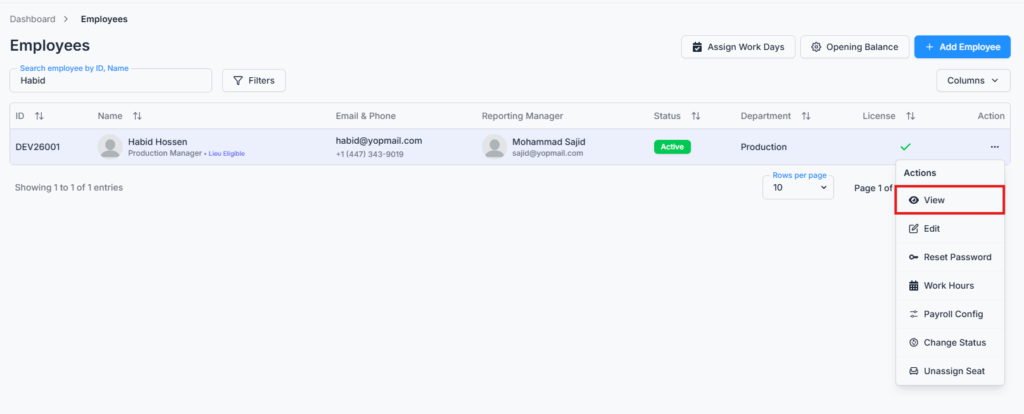
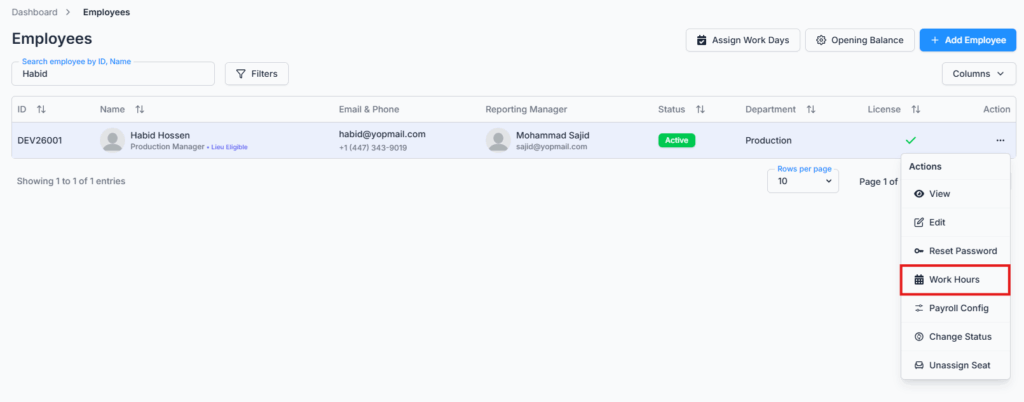
  • Employees list → row action menu → Work Hours — the same list on a page of its own, with paging, for employees who have a lot of assigned days.

And on the Att. Overview tab, the assigned day is already counted inside Expected Working Hours and Expected Working Days for the month. Create, edit or delete an assignment and all of these update together.

Notifications and Activity Log #

What you doWhat the employees get
Create an assignmentIn-app notification “Work Day Assigned” — date, start and end time, and the reason if you gave one.
Edit an assignmentIn-app notification “Work Assignment Updated” — the new date, times and reason. Anyone you removed from the assignment isn’t told.
Delete an assignmentNothing. Tell them yourself.

All three actions are written to the Activity Log under Attendance, with the date, the employees by name and ID, the times, the break, the working hours and the reason. An edit stores the values from before and after the change side by side, so you can always see exactly what changed, who changed it and when. That matters most for deletions, since those send no notification.

Your Routine at a Glance #

  1. Decide who needs to work, and on which date — today or later.
  2. Open Dashboard → Employees → Assign Work Days and check that date isn’t already taken for those people.
  3. Click Assign Work Days, pick the people or the team, set the date, hours and break, and write a reason.
  4. Click Assign, then check the new row shows the hours you expected.
  5. If the plan changes, Edit or Delete before the day’s start time — and if you delete, tell the employees yourself.
  6. After the day, check Attendance — an assigned day nobody attended is counted as absent.

Summary #

Assign Work Days lets the Subscriber Admin — or anyone holding Assign Work Days (For All) or (For Subordinate) — give employees or a team one extra working day, from today onwards, with its own hours and break. The day is real: it adds to the employee’s expected working hours, shows on their dashboard and their Work Hours tab, counts as absent if they don’t come in, uses their leave balance if they take leave, and turns a weekend or holiday into an ordinary working day for payroll. One assignment per employee per date, night shifts run past midnight by simply picking an earlier end time, and edits and deletions stay possible right up to the moment the day starts.

Updated on August 23, 2026
Opening BalanceVisual Guide
Table of Contents
  • Where to Find It
  • Who Can Use This Feature
  • Before You Start
  • Create a Work Day Assignment
  • Assigning to Employees
  • Assigning to a Team
  • What Happens After You Assign
  • View Work Assignment Details
  • Edit a Work Day Assignment
  • The Edit and Delete Deadline
  • Delete a Work Day Assignment
  • Finding the Assignment You Need
  • Where Assigned Work Days Appear on the Employee's Record
  • Notifications and Activity Log
  • Your Routine at a Glance
  • Summary

Office-X brings your people, payroll, clients, and daily operations together in one secure workspace.

Facebook Linkedin Youtube

Company

  • Partner Programme
  • Pricing
  • Trust & Security
  • Free Migration

EMPLOYEE MANAGEMENT

  • Onboarding & Performance
  • Attendance & OT
  • Time off / Leave
  • Work Shifts Schedule
  • Payroll
  • Internal Support

BUSINESS MANAGEMENT

  • CRM, Estimate & Agreement
  • Tasks Management
  • Web & AI Phone Bookings
  • Activity log
  • Permissions & Approval Flow
  • Asset & Incident Tracking

Resources

  • Help Center
  • See how it works
  • FAQs
© Office-X. All rights reserved.
  • Terms of Service
  • Cookie Policy
  • Privacy Policy