The Agreements module lets you create documents from your Docs templates, send them to one or more people for e-signature, and track their progress from viewing and signing to declining. You can easily see when everyone has signed and the Agreement becomes Active.
Good to know: Agreements is part of the CRM feature set, which is available as a paid add-on. If your company’s plan doesn’t include CRM, you can purchase the CRM add-on from Business → Billing & Payment. Once added, Agreements and the other CRM features become available.
Two Sides to Every Agreement #
Every Agreement has two very different people looking at it:
- You (the Subscriber Admin, or an employee with the right Agreements permissions) — pick a Docs template, decide who needs to sign and in what order, choose how strictly to verify each signer’s identity, and send it.
- Signers — the people you send it to. They never log into Office-X at all. They open an emailed link, prove who they are if you asked for that, fill in whatever’s assigned to them, and sign.
Example, start to finish: Sarah Mitchell is buying a home theater system from your company, and James Carter is signing on behalf of the vendor who’s supplying it. Here’s exactly what happens on each side:
| Step | You (Admin) | Signer |
|---|---|---|
| 1 | Pick the “Installation & Purchase Agreement” Doc template, fill in your own fields (e.g. the sale date), add Sarah as Signer 1 and James as Signer 2, and choose Email OTP as the verification method. | — |
| 2 | Click Send. | — |
| 3 | — | Sarah gets the email right away, since she’s Signer 1 (order 1). James gets nothing yet. |
| 4 | — | Sarah opens her link, enters the one-time code emailed to her, checks the e-signature consent box, fills in her assigned fields, and signs. |
| 5 | Office-X automatically emails James the moment Sarah finishes — you don’t do anything for this step. | — |
| 6 | — | James goes through the same steps: code, consent, fields, signature. |
| 7 | The Agreement becomes Active automatically. You and both signers all receive the final signed PDF by email. | — |
Keep this example in mind as you read the rest of this guide — most of what follows is really just a closer look at one row of that table.
Who Can Use This Feature #
Subscriber Admin can always create, view, edit, delete, send/resend, and terminate any Agreement, without needing any specific permission.
Employees need one of the permissions below, each controlled independently from Admin → Permission → CRM – Agreements:
- Create Agreement
Required action: Create - View All Agreements
Required action: View - Edit Agreement (For All)
Required action: Update - Delete Agreement (For All)
Required action: Delete - Send / Resend Agreement (For All)
Required action: Update - Terminate Agreement (For All)
Required action: Update
These permissions can be assigned directly to an employee, or to an entire team at once. See the Permissions Management guide for how to assign permissions.
The Agreement List #
Route: Dashboard → CRM → Agreements — this is what you land on first when you open the module.
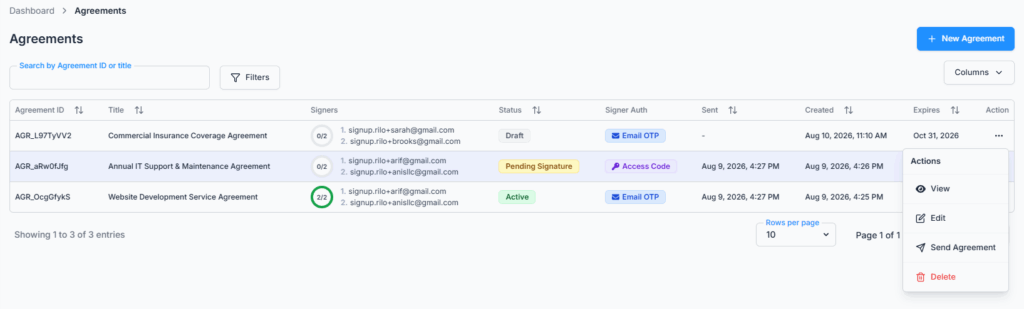
The table shows: Agreement ID, Title, Signers (a progress ring showing how many have signed out of the total, plus each signer’s order and email), Status, Signer Authentication method, Sent date, Created date, Expires date, and an Action column.
- Search — by Agreement ID or title.
- Filters — by Status.
- Sort — Agreement ID, Title, Status, Expires date, Created date, or Sent date.
Results are paginated (10, 20, or 30 per page), and the Columns option lets you hide any column you don’t need (everything except Action).
The Action dropdown is where you manage an Agreement. View is always available. Edit, Delete, and Send are available only for Drafts, while Resend and Terminate are available for Agreements that are Pending Signature or Partially Signed.
Creating an Agreement #
Click Add Agreement and fill in:
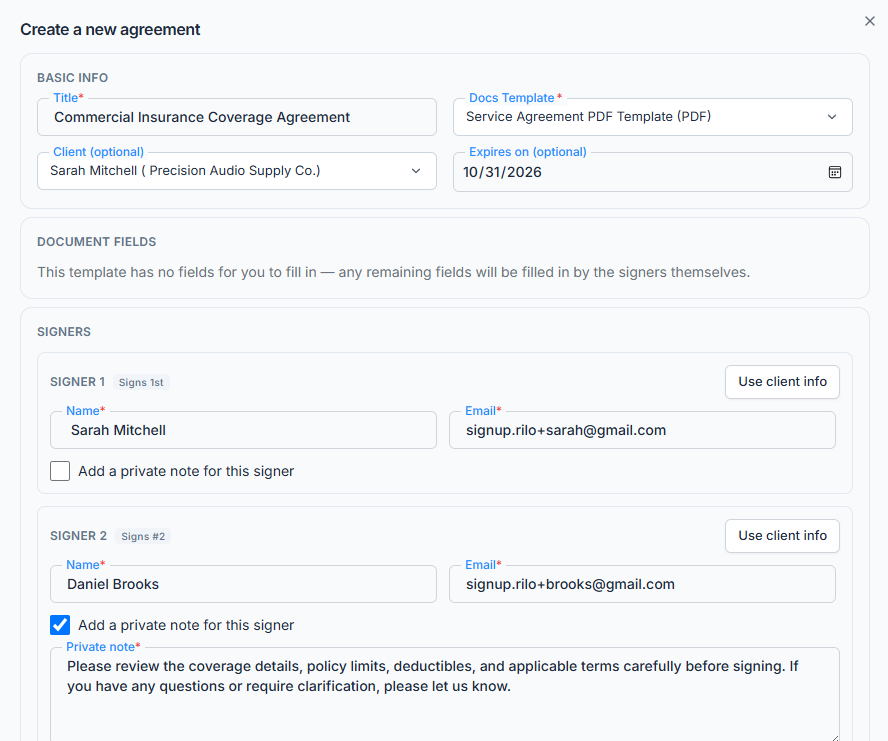
- Client — optional, search and select from your Clients.
- Template — search and select an Active Doc template. See the Docs guide for how to build one. A template needs at least one signer role before it can be used here.
- Fields — any field on the template that wasn’t assigned to a signer role is yours to fill in now. Fields assigned to a signer are left blank for that person to fill in when it’s their turn to sign.
- Signers — one row per signer role defined on the template (so a template with 2 roles gives you 2 signer rows; up to 10 total). For each, enter their Name, Email, and an optional private note to them (up to 500 characters) — the Signing Order and role name come from the template and aren’t editable here.
- Expires On — optional. If you leave it blank, Office-X fills it in automatically when you Send, based on the template’s Expiry Days setting (see the Docs guide). If you do set a date, it must be in the future.
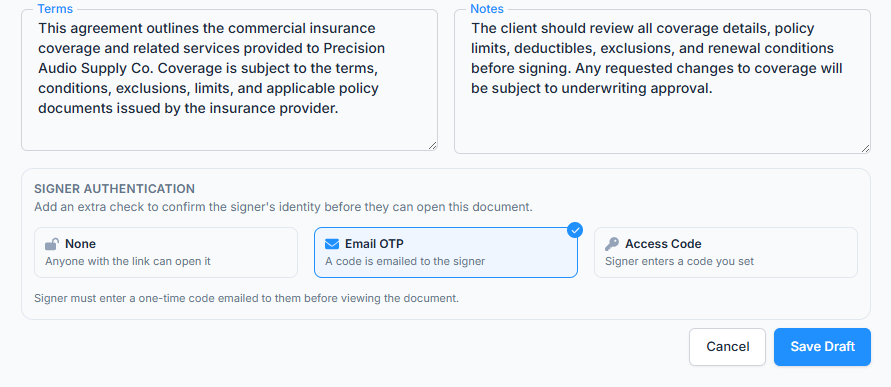
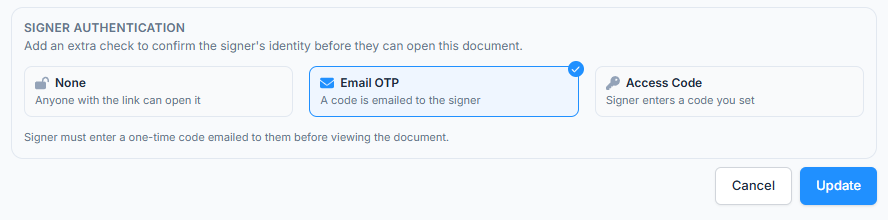
- Signer Authentication — None, Access Code, or Email OTP. Covered in full detail below.
- Terms and Notes — both optional, up to 2000 characters each, shown to signers.
The Agreement is created in Draft status — nothing is sent to anyone yet. Use the Action menu’s Send option separately, once you’re ready.
Signer Authentication #

This setting decides how sure Office-X needs to be that the person clicking a signing link is really who they say they are, before letting them see or sign the document. You pick one of three options when creating the Agreement.
Option 1: None #
The signer’s link opens the document directly — no code, no extra step. Use this when you’re confident the link itself (sent to an email address you trust) is enough, or for low-stakes internal paperwork.
Example: a quick internal acknowledgment form sent to a long-time employee — there’s little value in adding a verification step for something this low-risk.
Option 2: Access Code #
You set a code yourself when creating the Agreement. Every signer must type that exact code before they can view or sign — Office-X doesn’t send it for you, so you decide how they receive it (a phone call, a text, telling them in person).
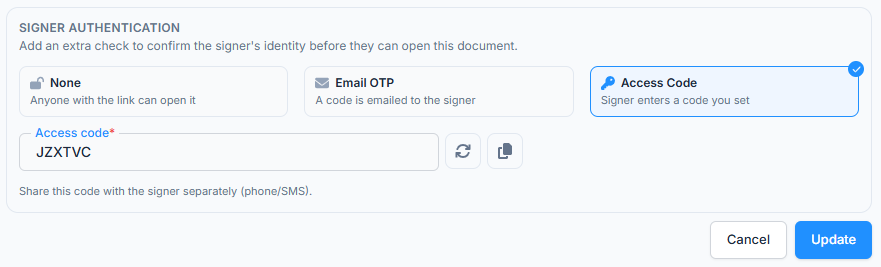
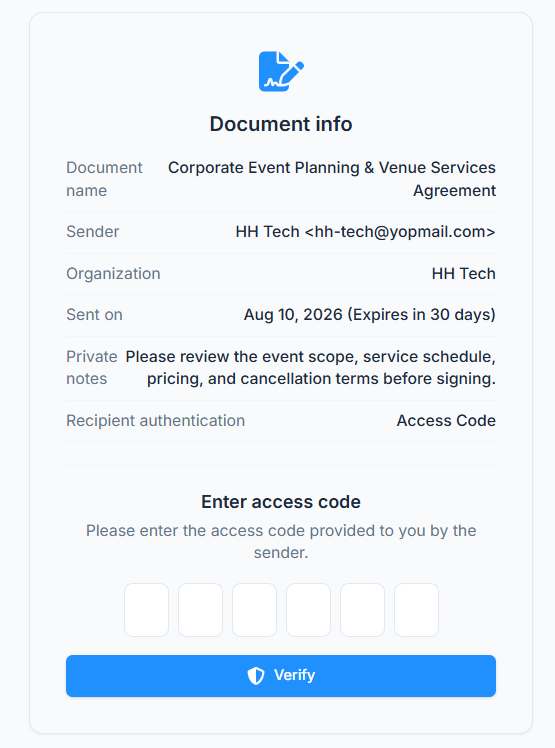
You can come back to the Agreement’s View page at any time afterward to see the code again and copy it, in case you need to re-share it.
Example: you’re sending a vendor contract and you’d rather confirm the signer’s identity over a phone call first, then read them the access code directly, instead of relying only on their email.
Option 3: Email OTP #
The first time a signer opens their link, Office-X emails them a 6-digit one-time code (valid for 10 minutes). They can request a new one after a 60-second cooldown, up to 5 times, and get up to 5 attempts to enter it correctly. Once verified, that signer won’t be asked again for the rest of that Agreement.
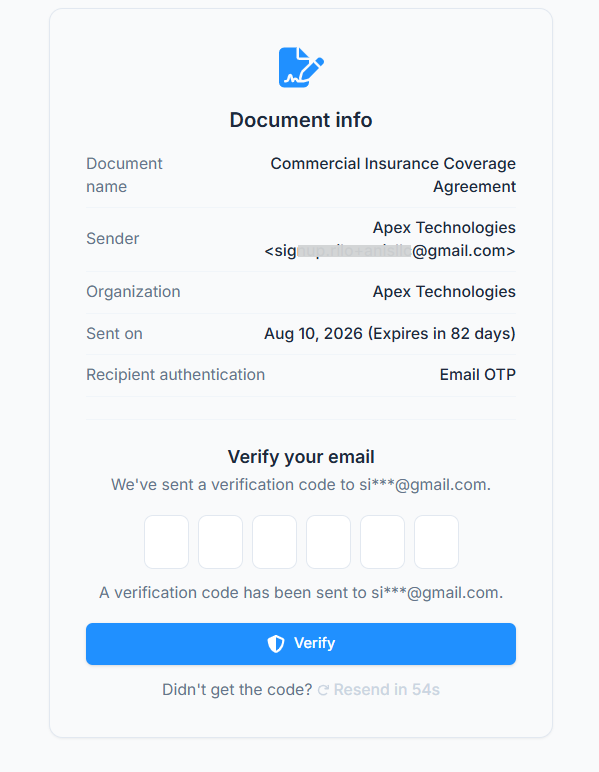
Example: our Sarah-and-James Purchase Agreement from earlier used Email OTP — Sarah received a one-time code by email before she could view or sign anything, and so did James once it was his turn.
Agreement Lifecycle #
- Draft — being put together, not yet sent to anyone.
- Pending Signature — sent; at least one signer hasn’t signed yet.
- Partially Signed — at least one signer has signed, but not everyone.
- Active — every signer has signed.
- Declined — a signer declined.
- Expired — nobody finished signing before the expiry date.
- Terminated — you cancelled it before it was fully signed.
Good to know: An Agreement becomes Active only after all signers have signed. Declined, Expired, and Terminated are final statuses and cannot be reopened or reactivated. If you need to start the agreement again, create a new Agreement.
How Multi-Signer Order Works #
Signers don’t necessarily go one at a time in a strict queue — they go in tiers, based on each role’s Signing Order number from the template:
- When you Send, only the signer(s) in the lowest Signing Order tier get their link and email right away. Everyone else is marked as waiting their turn — they get no link yet.
- The moment every signer in the current tier has signed, Office-X automatically emails the link to the next tier’s signer(s).
- If two or more signers share the same Signing Order number, they’re a single tier and can sign in any order relative to each other — whoever gets to it first.
This is exactly what happened in our Sarah-and-James example above: Sarah (order 1) received the link immediately, while James (order 2) received nothing until Sarah had actually finished signing.
What a Signer Sees #
Opening the link (once past any verification step) shows the signer a brief landing screen, then walks them through:

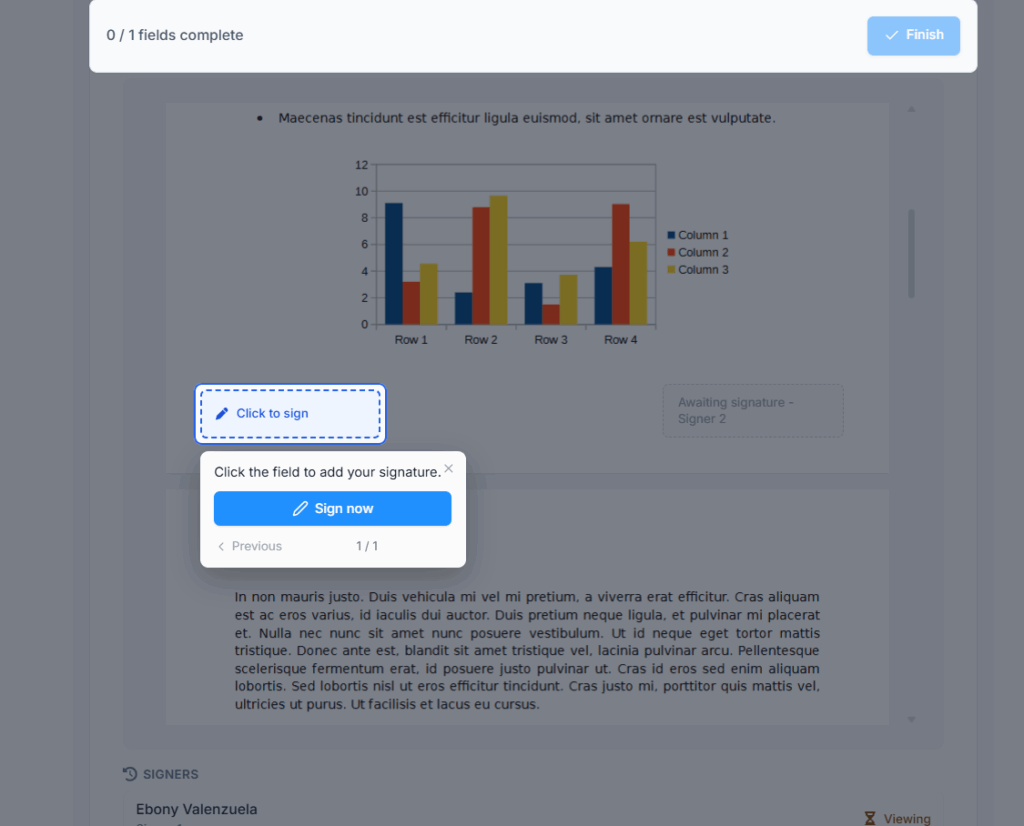
- Checking “I agree to use electronic signatures for this document” — required before continuing.
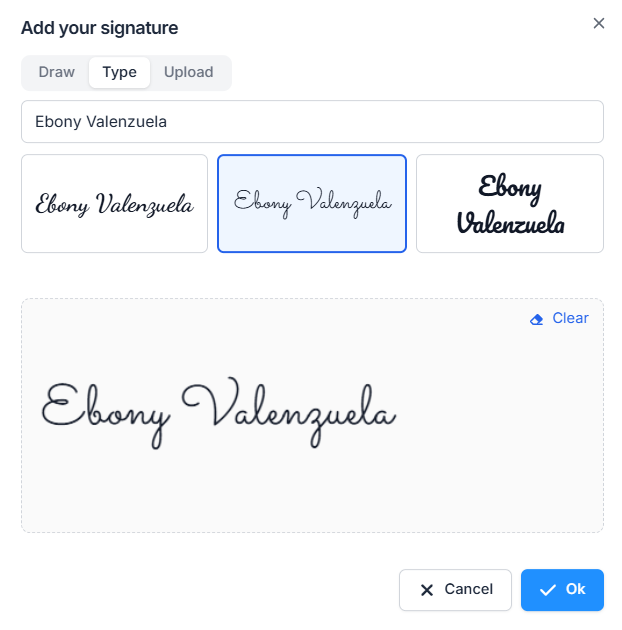
- Filling in any fields assigned to them, and providing their Signature and/or Initials — drawn by hand, typed in a signature font, or uploaded as an image.
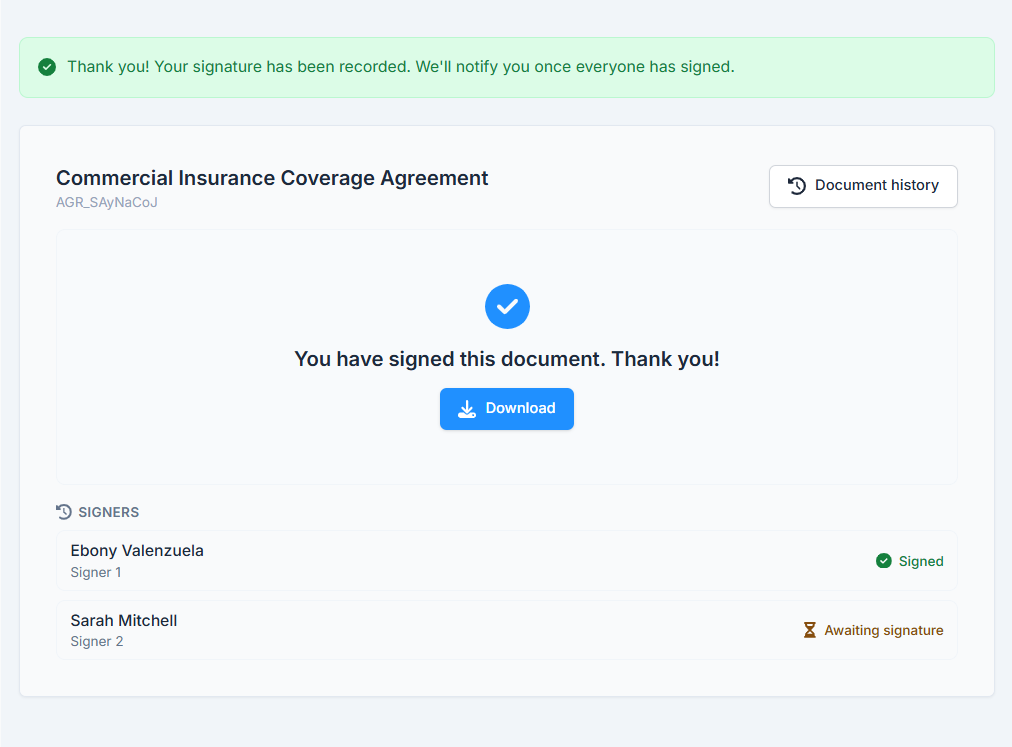
- Submitting.
Good to know: a signer only ever draws/types/uploads their signature and initials once per Agreement — if the document has, say, an initials box on every page, the same initials image is automatically stamped on each one; they don’t have to redo it page after page.
Viewing an Agreement (Your Side) #
Clicking View from the Action menu (or the row itself) opens your own internal look at the Agreement — separate from what any signer sees. Top to bottom, it shows:
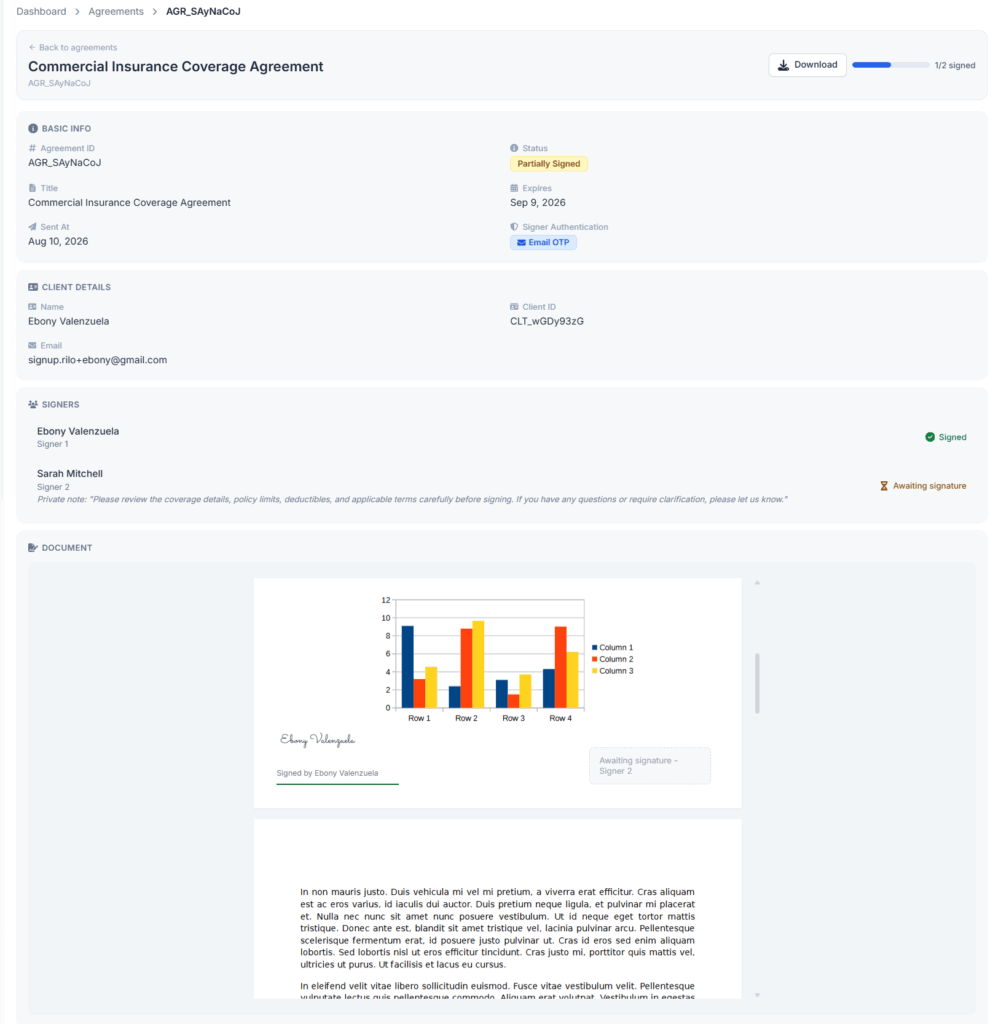
- Basic Info — Title, Status, Expires On, Sent date, and (if it’s Terminated) the Termination Reason.
- Client Details — if a Client was linked when this Agreement was created.
- Signers — each signer’s name, role, current status (Pending, Waiting Their Turn, Sent, Viewed, Signed, or Declined), their private note if you left one, and their decline reason if they declined.
- Document — the actual agreement, rendered with every field’s current value and any signatures collected so far.
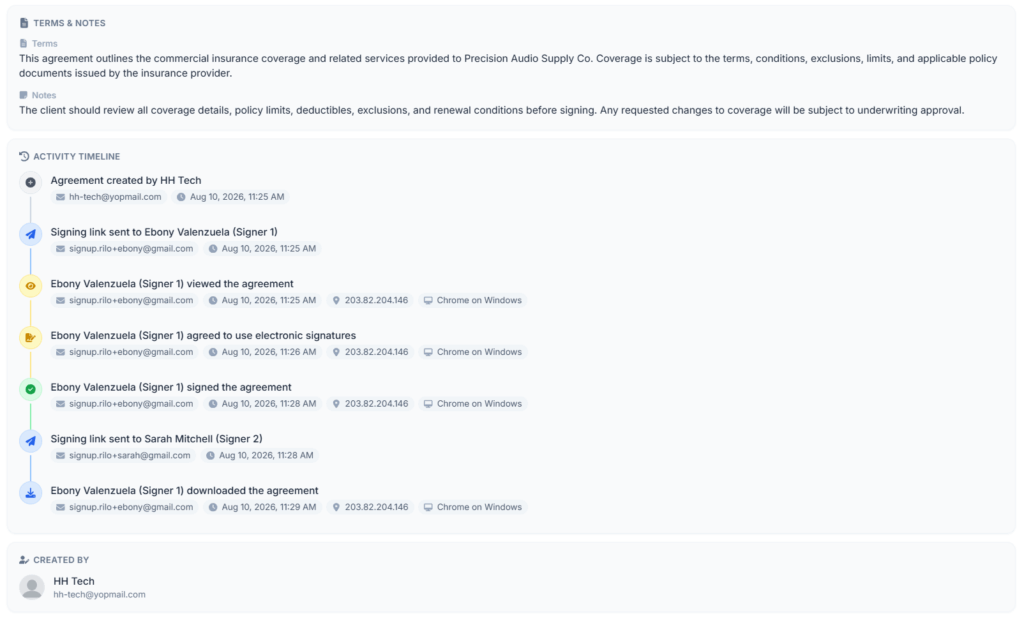
- Terms & Notes, if either was filled in.
- Activity Timeline — a more detailed version of what a signer sees on their own side: every sent/viewed/consented/signed/declined event, each with an IP address and device/browser chip, plus a “created” entry naming the staff member who set it up — details a signer’s own copy of this history never includes.
- Created By — who created it, with their photo and email.
Two things you can do directly from this page:
- Download — appears once at least one signature has been collected (Office-X generates a snapshot PDF after every signature, not only at the very end — see “The Signed Document” below). Downloading from here is recorded in the Activity Timeline as a staff download, separately from any signer’s own download.
- View / Copy the Access Code — only shown if this Agreement’s Signer Authentication is set to Access Code. Handy if you need to re-share the code with a signer who lost it.
Good to know: everything else — Edit, Send, Resend, Terminate, Delete — is only available from the Agreement list’s Action menu, not from this page.
Resending the Invitation #
If a signer says they never got the email, or lost it, use the Action menu’s Resend option (available while the Agreement is Pending Signature or Partially Signed). It emails a fresh link to whoever’s turn it is right now — not to everyone. Someone who has already signed isn’t bothered again, and someone still waiting their turn stays waiting: they’ll get their own email automatically when their tier comes up.
Good to know: there’s a short pause built in so a signer isn’t flooded with emails. You can resend to the same signer once a minute, up to 20 times in total. If you click too soon, you’ll see “Please wait before resending again — these signers were just resent an invitation, or have reached the resend limit.” Wait a minute and try again.
If nobody is currently waiting to sign — for example, everyone in the current tier has already signed and the next tier is being emailed — you’ll see “No signer is currently awaiting a signature to resend to.” That’s normal; nothing is stuck.
Declining #
If the template’s Allow Decline setting is on, a signer can decline instead of signing (typing a reason, if the template requires one).
Important: a decline affects the whole Agreement, not just that one signer’s part. The moment any signer declines, the entire Agreement moves to Declined — nobody else can sign after that, and every other signer who hadn’t finished yet is emailed that the agreement was declined.
Terminating an Agreement #
If you need to call off an Agreement before everyone’s signed, use the Action menu’s Terminate option — available while it’s Pending Signature or Partially Signed. Every signer who hadn’t finished yet is notified, and their links stop working. There’s no way to un-terminate — if needed, create a fresh Agreement instead.
Expiry #
An Agreement that’s still Pending Signature or Partially Signed automatically moves to Expired once its Expires On date passes — checked both the moment anyone opens a link after that date, and once a day automatically in the background, so it’ll show as Expired even if nobody opens a link again.
Good to know: once an Agreement is fully signed and Active, its expiry date no longer matters — Active agreements never expire.
Editing and Deleting an Agreement #
Both are only available while the Agreement is still Draft — once it’s been sent, you can no longer edit or delete it; your remaining options are Resend, Terminate, or simply letting it run its course.
The Signed Document #

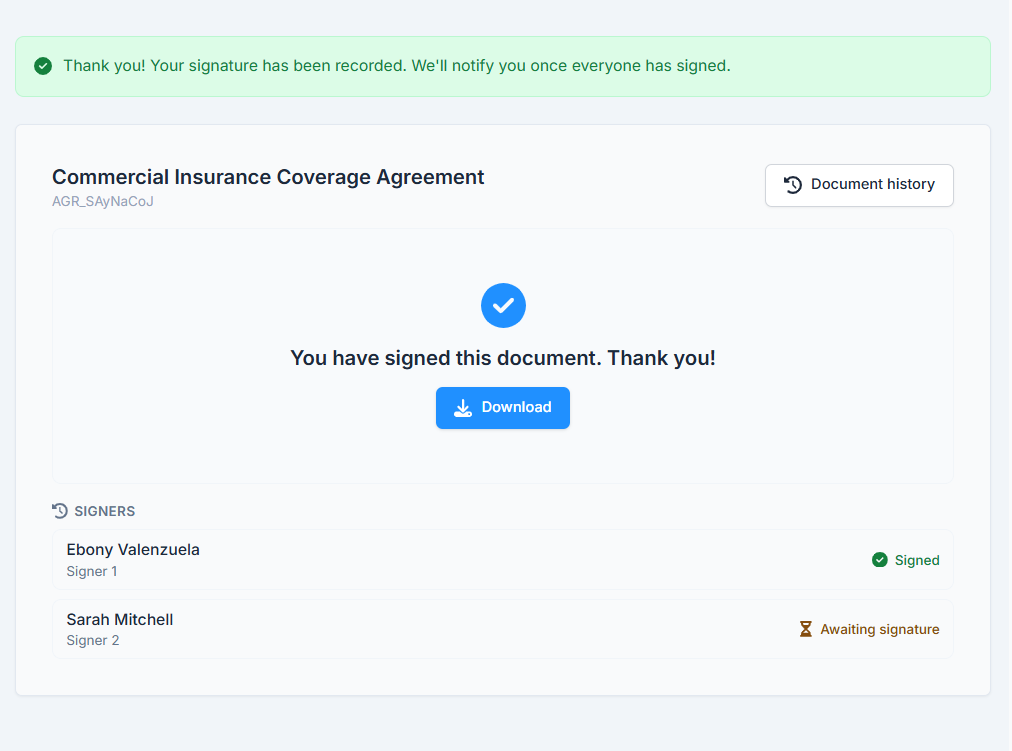
Office-X generates a PDF of the Agreement after every signature — not just once at the very end — so there’s always an up-to-date copy reflecting who’s signed so far, downloadable from the View page as covered above. Once the Agreement becomes Active, the final, fully-signed PDF is also emailed automatically to every signer and to whoever created the Agreement.
How Agreements Connect to the Rest of CRM #
- Docs — every Agreement is created from a Doc template, and freezes a snapshot of that template’s fields, roles, and settings at creation time — see the Docs guide for exactly what that means. Only Active templates with at least one signer role can be used, and a template that’s been used at least once can no longer be deleted.
- Clients — linking a Client is optional and purely for your own record-keeping. The people who actually sign are the signers you add by name and email, which don’t have to match any Client record. Note that once an Agreement is linked to a Client, that Client can no longer be deleted.
Activity Log #
Alongside the per-agreement Activity Timeline on the View page, your company’s central log records every Agreement created, edited, sent, resent, terminated, deleted, and downloaded from the dashboard — with who did it and when. You’ll find it under Dashboard → Admin → Activity Log, filtered to Agreement. See the Activity Logs guide for how to search it. What the signers themselves did — viewing, consenting, signing, declining — stays in the agreement’s own timeline, together with the IP address and device they used.
Summary #
Agreements turns a Docs template into an actual signature request — you handle the setup (template, signers, verification method, sending), while every signer’s job is simply to open their link, prove who they are if asked, and sign. Office-X routes each signer in the right order automatically, keeps a running PDF snapshot the whole way through, and only marks the Agreement Active once every last signer has signed. A single decline, an expired deadline, or a manual termination all end it permanently, with no way back — so double-check before sending, and use Draft freely to get everything right first.
