
The Email Templates module allows your organization to manage all automated emails sent by the system. Admins can quickly view, edit, or create templates for notifications, ensuring communication is consistent, professional, and aligned with company standards.
Under the Templates section, you’ll find all the email templates your system uses for automatic notifications — such as leave requests, support tickets, or password resets.
By default, templates are already created for all major features — when your company was set up, Office-X copied its current default template for every feature into your account. You can easily edit templates or create new ones for any feature that doesn’t have one yet based on your business needs.
Who Can Use This Feature #
Subscriber Admin can access this page and manage every template.
Good to know: unlike most other features in Office-X, Email Templates has no delegable permission — there’s no way to grant a regular employee access to it from Admin → Permission, not even View-only. This page is Subscriber Admin only.
Default Templates Example #
When you (the Subscriber Admin) register your company on Office-X, your Templates list doesn’t start empty — Office-X automatically copies its own current default template for each of the major Features into your account, already configured and ready to send.
You don’t have to use them as-is: open any of these default templates and edit them with your own company’s information — your branding, wording, and details — the same way you would any template you create yourself.
Note: Each Feature can only have one template per company — trying to create a second template for a Feature that already has one is rejected with “Template already exists for this feature.” Edit the existing one instead.
Good to know: the Business Support ticket you send to Office-X (Business → Support) isn’t one of the Features you can select or customize here — its email design belongs to Office-X and can only be customized by the Office-X platform admin team, not by your company. If your company hasn’t set one up yet, your Business Support emails simply use Office-X’s standard design.
Which Template Is Used For What #
Here’s exactly what each of the pre-loaded Features is for, who receives that email, and what triggers it:
| Feature | Who Receives It | When It’s Sent |
|---|---|---|
| Welcome Employee | The new employee | Right after an admin creates their employee account — includes their login email and password. |
| Employee Password Reset | The employee | Right after an admin manually resets that employee’s password — includes their new temporary password. |
| Leave Request | The employee who requested the leave | Right after they submit the request, and again once the request reaches its final Approved or Rejected outcome. |
| Leave Approval | The approver at each step of that Leave request’s approval flow | As soon as the request reaches their step and is waiting on their decision. |
| Bill Request | The employee who submitted the bill | Right after they submit it, and again once it reaches its final Approved or Rejected outcome. |
| Bill Approval | The approver at each step of that Bill request’s approval flow | As soon as the request reaches their step and is waiting on their decision. |
| Purchase Request | The employee who submitted the purchase request | Right after they submit it, and again once it reaches its final Approved or Rejected outcome. |
| Purchase Approval | The approver at each step of that Purchase request’s approval flow | As soon as the request reaches their step and is waiting on their decision. |
| Travel Request | The employee who submitted the travel request | Right after they submit it, and again once it reaches its final Approved or Rejected outcome. |
| Travel Approval | The approver at each step of that Travel request’s approval flow | As soon as the request reaches their step and is waiting on their decision. |
| Support Request | The employee who filed the ticket, and every Resolver assigned to that ticket’s category | Right when the ticket is submitted (a confirmation to the employee, and a “new ticket” alert to every Resolver on that category), and again to the employee once the ticket is marked Resolved or Closed. |
| Incident Report | The employee who filed the report, and that Incident Type’s managers (or the Subscriber Admin, if that type has no managers assigned) | Right after the report is submitted, and again once it’s marked Completed or Discarded. |
| Self-Assessment Invitation | Each invited employee | Right when a manager or the Subscriber Admin sends out self-assessment invitations for a review quarter. |
| Assessment Update | The employee’s manager, and the employee themselves | Reused across three moments in one self-assessment cycle: the employee’s manager is notified when the employee submits their self-assessment, the employee is notified once their manager finalizes it, and the employee is notified again once it’s marked complete. |
| Estimate | The client the estimate was sent to (not an employee) | Right when you send an Estimate to a client from the CRM, and again as its status changes — viewed, accepted, declined, expired, or converted. |
| Agreement | The client the agreement was sent to (not an employee) | Right when you send an Agreement to a client from the CRM, and again as its status changes — pending signature, partially signed, active, declined, or terminated. |
| Agreement Authentication | Whoever is opening an Agreement to view or sign it (not necessarily an employee) | Every time someone needs to verify their identity to access an Agreement — contains the one-time authentication code needed to open it. |
| Booking | The client the booking is for (not an employee) | Right when a booking is confirmed, rescheduled, or cancelled. |
| Login OTP | The person signing in | Every time someone whose account has Two-Factor Authentication enabled logs in — contains the one-time code needed to finish signing in. |
| Two-Factor Authentication | The employee or admin making the change | Right when they turn their own Two-Factor Authentication on or off — the code confirms that specific change. |
| Forgot Password | The person requesting the reset | Right after they use “Forgot Password” on the login screen — contains their password-reset link. |
Note: For the four request types above (Leave, Bill, Purchase, Travel), the “…Request” template always talks to the person who submitted the request — both at submission and at the final outcome — while the “…Approval” template always talks to whoever needs to approve it at each step. If your approval flow for a Feature has more than one step, the “…Approval” template is reused for every step’s approver, one at a time, as the request moves forward. Incident Report, Self-Assessment Invitation, Assessment Update, Estimate, Agreement, and Booking work differently — each is a single, shared template reused for every stage of its own lifecycle (rather than a separate Request/Approval pair), with the specific stage passed in as part of the message content. Agreement Authentication is different again — it’s a single-purpose utility email, like Login OTP or Forgot Password, rather than a multi-stage lifecycle template.
Good to know: Estimate, Agreement, Agreement Authentication, and Booking are CRM communications sent to your clients, not to employees — keep that in mind when writing their wording, since they’re read by someone outside your company.
Create or Edit an Email Template #
Go to Templates → Create Template (to create a new email template) or Update Template (to edit an existing template).
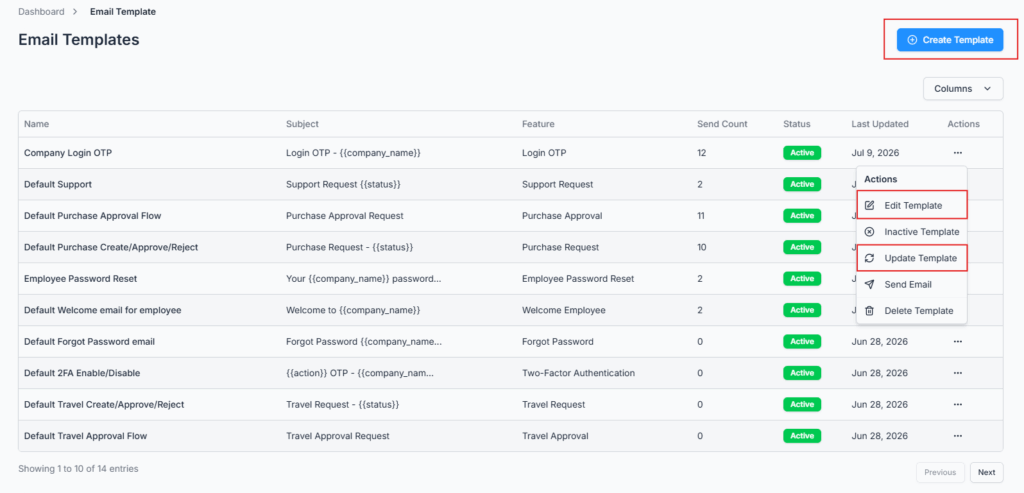
When creating or editing a template, you’ll see options like:
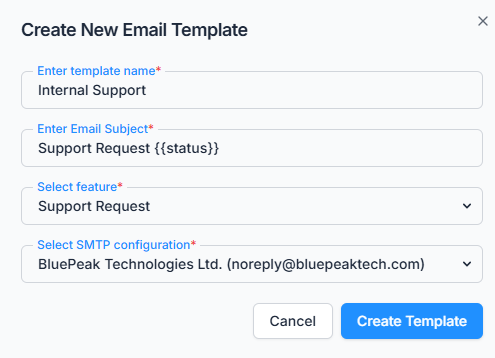
- Template Name– Give your email a clear and meaningful name.
- Email Subject– The subject line shown to recipients.
- Select Feature– Choose which system feature (Support, Leave, Travel, Purchase, etc.) this template applies to. Available only if that feature doesn’t already have a template.
- Select SMTP Configuration– Select which SMTP account will be used to send this email. Only your Active SMTP accounts (plus the shared Office-X default) are offered here — see the SMTP Configuration guide.
When you create a template for a Feature, it doesn’t start blank — it’s pre-filled with Office-X’s current default design, subject, and content for that Feature, so you’re customizing a working starting point rather than building from scratch.
Update Template
Template Editor – Edit using:
- Drag & Drop Editor for a no-code design experience, or
- HTML Mode for full control over layout and styling.
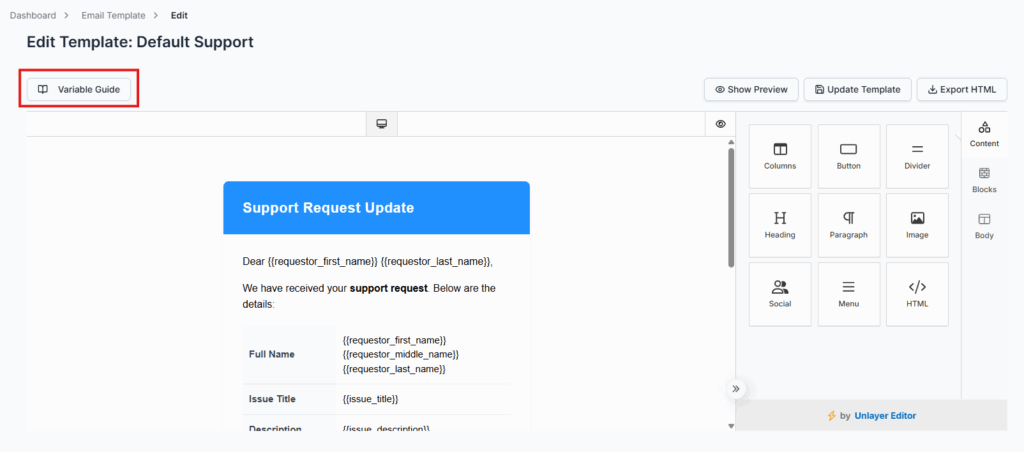
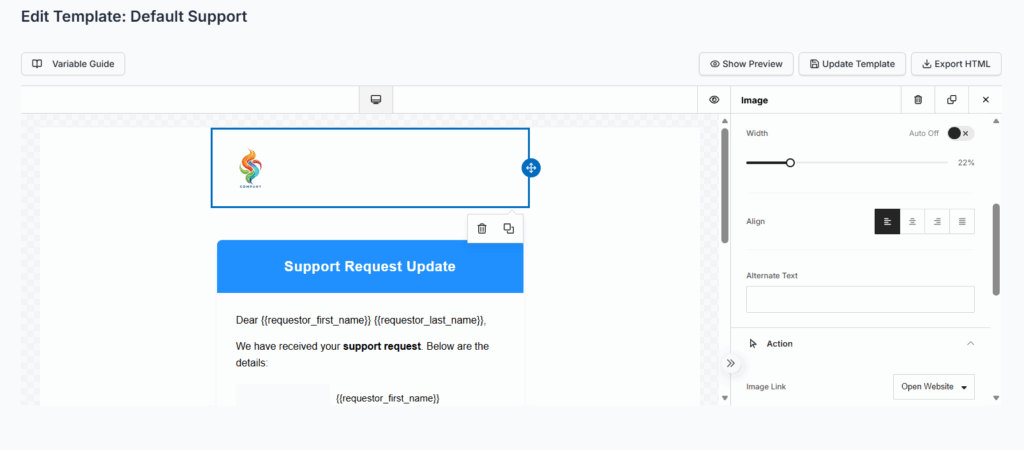
You can also preview your design instantly with Show Preview or export it as HTML.
Template Variables Guide #
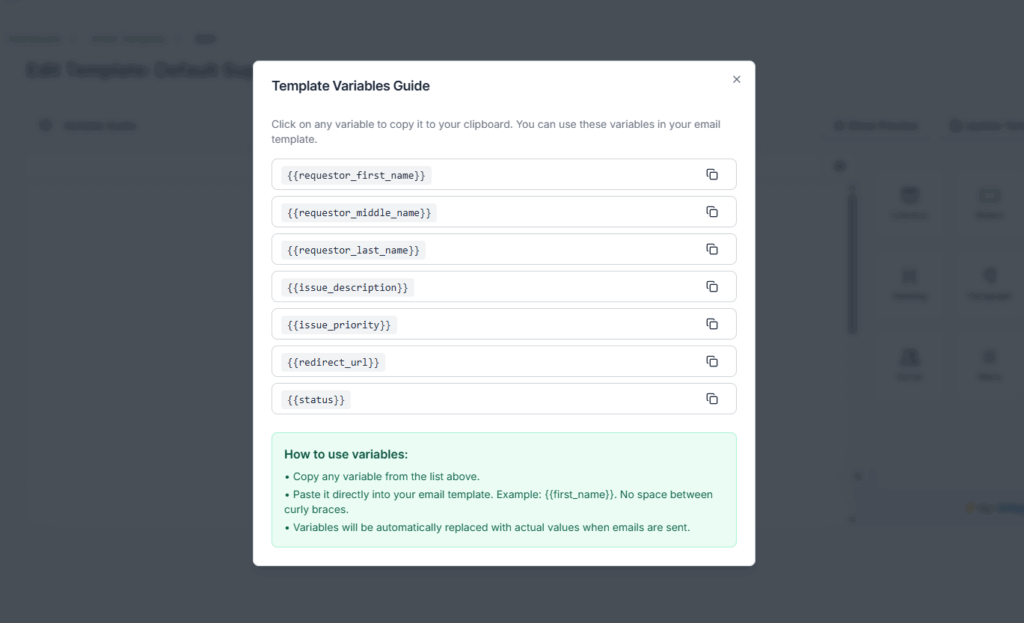
Use dynamic variables inside your template to automatically pull user-specific data when emails are sent. The variables available depend on which Feature the template is for — a Leave Request template and a Support Request template don’t offer the same list.
Example: For a Support Request template,
Dear {{requestor_first_name}},
Your support request under “{{category_title}}” is now marked as {{status}}.
Available Variables for Support Request:
{{company_name}}{{requestor_first_name}}{{requestor_middle_name}}{{requestor_last_name}}{{category_title}}{{issue_description}}{{issue_priority}}{{status}}{{redirect_url}}
Other features have their own sets — for example, Bill Request offers {{bill_title}}, {{bill_amount}}, {{date_of_expense}}, and {{expense_category}}; Leave Request offers {{leave_type}}, {{hours}}, {{starting_date}}, and {{ending_date}}; and the “…Approval” features (Bill Approval, Leave Approval, Purchase Approval, Travel Approval) additionally include the original requestor’s name and email alongside the approver’s own details. Among the newer features, Incident Report offers {{incident_name}}, {{incident_type}}, {{severity}}, {{reported_by_name}}, and {{status}}; Self-Assessment Invitation offers {{quarter_name}}, {{criteria_list}}, and {{requested_by_name}}; Assessment Update offers {{quarter_name}}, {{status}}, {{score}}, {{total_possible}}, {{percentage}}, {{criteria_rows}}, and {{feedback}}; and the client-facing Estimate and Agreement templates offer {{client_name}}, {{organization_name}}, plus document-specific variables like {{grand_total}}/{{valid_until}} (Estimate) and {{signer_count}}/{{expiry_date}} (Agreement). The editor only shows you the variables that are actually valid for the Feature you selected.
How to Use:
- Copy any variable from the list.
- Paste it directly in your email content — example:
{{first_name}}. - The system will automatically replace it with real data when the email is sent. A variable that isn’t in your Feature’s list (or is misspelled) won’t be replaced — it will show up literally as
{{like_this}}in the email recipients receive, so always copy variables from the guide rather than typing them by hand.
Template Actions #
Each email template includes several actions:
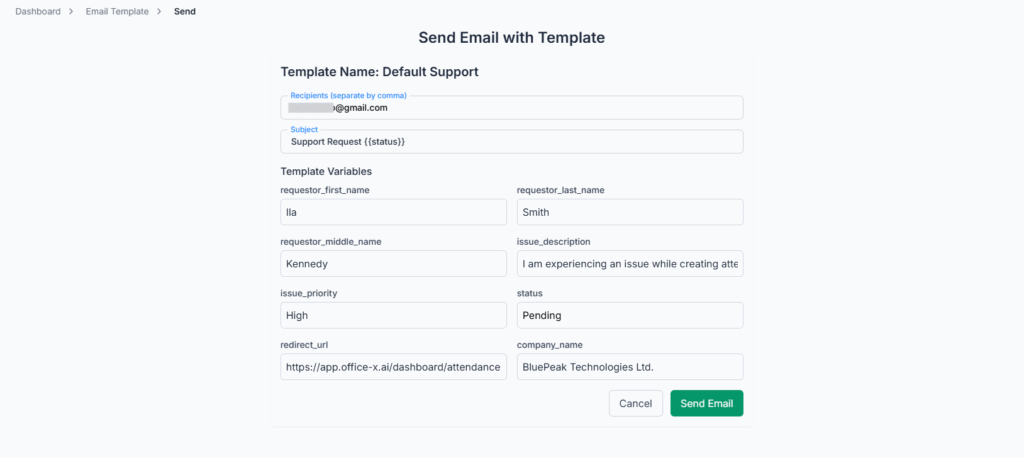
- Send Email – Manually send this template to any email address(es) you enter (comma-separated) — handy for testing, or for resending a copy to someone directly. This also counts toward the template’s Send Count, the same as an automatic send.
- Update Template – Modify the design or content in the built-in editor.
- Edit Template – Modify Email template information (name, subject, feature, SMTP).
- Activate / Inactivate – Enable or disable the template.
- Delete Template – Permanently remove it from the system.
⚠️ Important: Inactivating a template blocks the manual Send Email action, and Office-X stops using your customized design and wording for that feature’s automated emails. For Welcome Employee, Password Reset, Leave/Bill/Purchase/Travel Request & Approval, Support Request, Estimate, Agreement, Booking, Login OTP, Two-Factor Authentication, and Forgot Password, it does not stop the emails themselves — for example, inactivating your “Leave Approval” template doesn’t mean employees stop hearing about leave approvals; instead, Office-X automatically falls back to its own plain, built-in email design for every send that feature would normally trigger, until you reactivate your template. So the emails keep going out, just without your customization, branding, or wording — which can be confusing if recipients suddenly start receiving a generic-looking email instead of your usual one.
Agreement Authentication falls back a little differently: instead of a designed fallback email, an inactivated (or never-customized) Agreement Authentication template falls back to a bare plain-text message with just the authentication code — it still gets delivered, just without any design at all.
This is different for Incident Report, Self-Assessment Invitation, and Assessment Update — these three don’t have a generic built-in design to fall back to. Inactivating (or not yet creating) a template for one of these Features means the email doesn’t get sent at all for that Feature, not even in a plain default format. Double-check before deactivating a template for any of these three that’s actively relied on.
Why It Matters #
A professional and well-configured email system ensures:
- Reliable delivery of all automated notifications.
- Consistent branding and tone in company communication.
- Easy customization for feature-specific messages.
- Full control over who sends what, and from which address.
Summary #
The Email Templates module lets admins manage all automated emails, ensuring consistent communication and branding. With easy editing, and dynamic variables, you can customize, preview, and send templates reliably across all system features.