
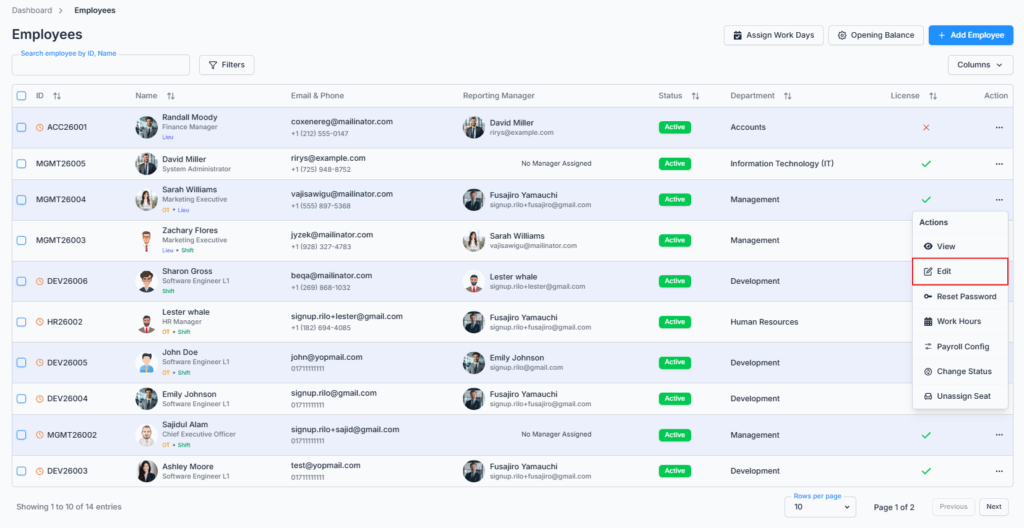
The Edit Employee page is accessed via the “Edit” option in the Action Menu of the Employee Table under the Employees route, or from the Edit Employee button on an employee’s own profile page. This page allows admins and permitted users to update employee information quickly and accurately while keeping all records up to date.
Note: the employee must already have a license/seat assigned. If they don’t, the Edit option won’t appear at all, and opening the edit page directly shows Access Denied.
Who Can Use This Feature #
Subscriber Admin can always edit any licensed employee, without needing any specific permission.
Employees can edit other employees only if they hold the permission below.
Permission Behavior
This is controlled from: Admin → Permission → Employee → Edit Employee (For All)
- Edit Employee (For All)
Required action: Update
Lets you open and save changes on any licensed employee’s Edit page.
Without this permission (and without being the Subscriber Admin), the Edit option doesn’t appear in the Action Menu or on the profile page — and this is genuinely enforced, not just hidden: opening the edit page directly by URL is also blocked server-side and shows Access Denied, and even if that were bypassed, saving the form would still be rejected on the server.
This permission can be assigned directly to an employee, or to an entire team at once. See the Permissions Management guide for how to assign permissions.
Overview #
This page opens the same 5-step form used by Add Employee, but pre-filled with the employee’s existing data instead of starting blank:

- Employment Info
- Personal Info
- Present Address
- Permanent Address
- Bank Details
Step 1: Employment Info #
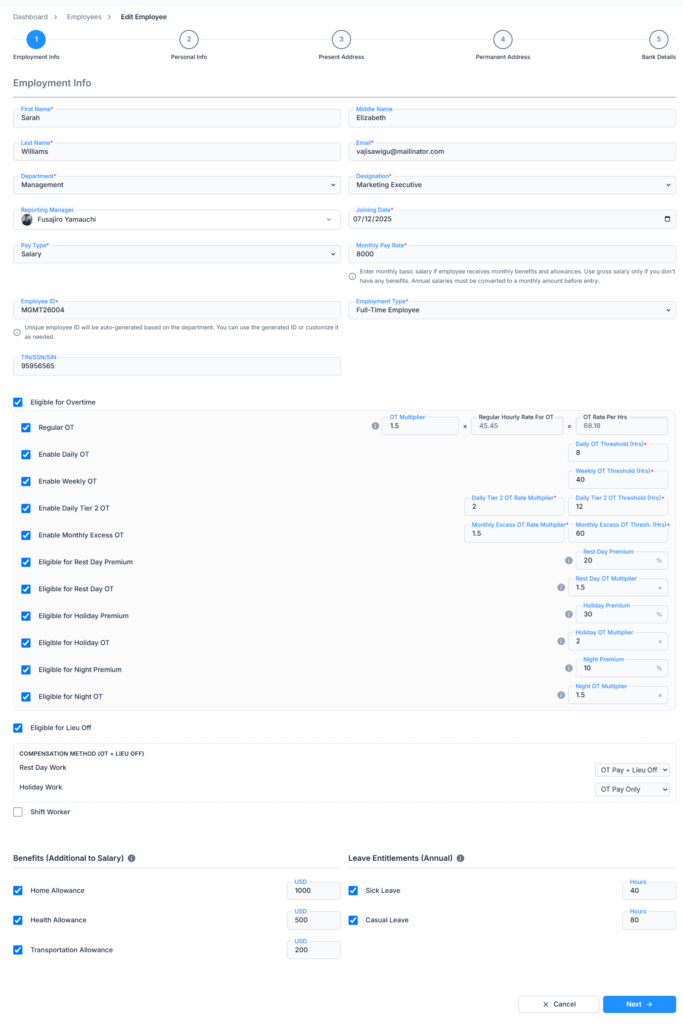
Pre-filled fields:
- First Name, Middle Name, Last Name
- Department
- Designation
- Reporting Manager
- Joining Date
- Pay Type and Pay Rate
- Employee ID
- Employment Type
- Probation End, and Eligible for Paid Leave on Probation Period
- Eligible for Overtime
- Eligible for Lieu Leave
- Shift Worker
- TIN / SSN / SIN
- Benefits
- Leave Entitlements
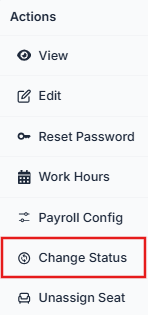
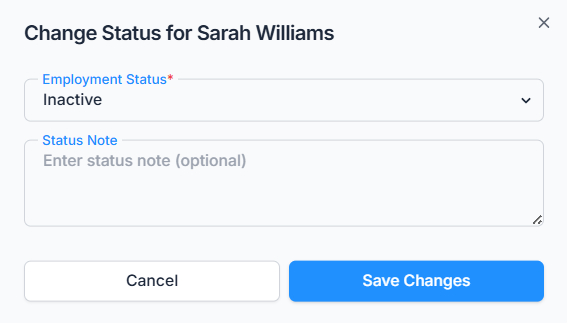
Note: Employment Status is not on this list — unlike Add Employee, it isn’t part of this form at all. It can’t be changed here even by accident. To change an employee’s status, use the separate Change Status action from the Employees list or the employee’s profile page instead.
→ Employee ID
The Employee ID is pre-filled with the employee’s current ID, and you can edit it by hand if needed. As you type, the system checks in the background whether the new ID is already used by someone else, and blocks you from continuing until it’s unique.
Good to know: unlike Add Employee, changing the Department here does not regenerate the Employee ID. In Add Employee, picking a department auto-fills a new ID; in Edit, the ID field already has a value from the start, so switching departments leaves it untouched — you’d need to change it yourself if you want it to match a new department’s naming.
→ Department, Designation, and Reporting Manager
Department and Designation work the same way as Add Employee — the Designation list depends on the Department selected, and changing Department to one where the current Designation doesn’t belong clears the Designation field.
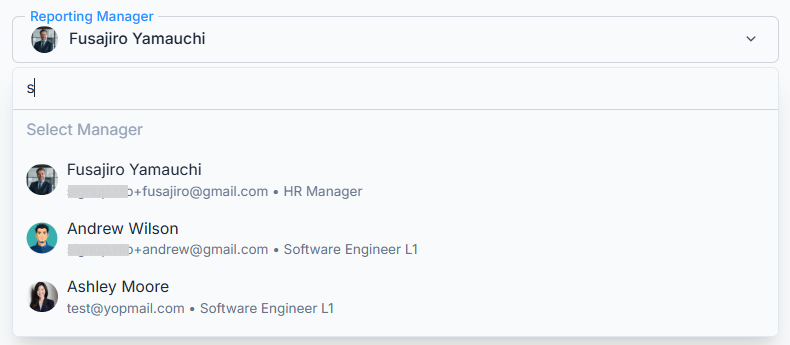
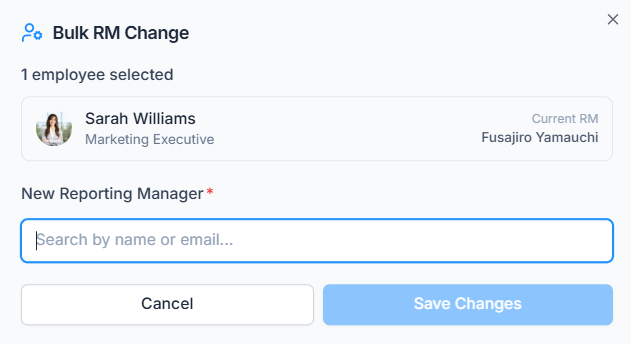
Reporting Manager can be changed here, directly from Step 1, using a searchable list. It won’t let you pick the employee themselves, or someone who already reports to them (to prevent a reporting loop). This changes the Reporting Manager for this one employee only — to change several employees’ Reporting Manager at the same time, use Bulk Change Reporting Manager from the Employees list instead.
→ Pay Type and Pay Rate
Works the same as Add Employee: the Pay Rate label switches to Hourly Pay Rate or Monthly Pay Rate depending on the selected Pay Type.
Good to know (Impact Reflection): changing Pay Type here doesn’t touch payroll (if eligible) that’s already been generated — any payroll already submitted keeps the settings that were in effect at the time, and isn’t recalculated retroactively. The new Pay Type only applies the next time payroll is run for this employee.
→ Overtime and Lieu Leave
These work exactly as described in the Add Employee guide: the Overtime fields shown depend on what your company has configured under Business → Payroll Configuration → Overtime Calculation Setting, and Overtime and Lieu Leave can both be enabled together, which reveals a Compensation Method section for Rest Day and Holiday work.
Good to know (Impact Reflection): just like Pay Type, changing Overtime or Lieu Leave eligibility here only affects payroll that hasn’t been run yet. It doesn’t retroactively change anything on payroll already generated for this employee.
→ Probation Settings
This behaves a little differently from Add Employee:
- If the employee’s probation period has already ended, the Probation End field (and the “Eligible for Paid Leave on Probation Period” option with it) disappears from the form entirely — there’s nothing left to edit for a probation that’s over.
- If probation is still ongoing, the Probation End date can’t be set earlier than the Joining Date — and unlike Add Employee, this is checked as soon as you move past Step 1, not deferred to the very end of the form.
- The date picker also won’t let you pick a date before today, as a convenience — though this particular rule is just the date picker’s own floor, not something re-checked elsewhere in the form.
→ Shift Worker
Same as Add Employee — this checkbox is just a flag. Changing it here doesn’t do anything else within this form; it determines whether the employee gets set up with a shift schedule or a regular weekly schedule the next time their Work Hours are configured.
→ Benefits and Leave Entitlements
These are pre-filled with whatever the employee currently has assigned, sourced the same way as Add Employee (Admin → Benefits and Admin → Leave Type respectively; leave types with “Lieu” in the name are excluded here too).
Good to know (Impact Reflection): unlike payroll-related settings, changes to Benefits and Leave Entitlements here take effect immediately on the employee’s current balance as soon as you save — they’re not held back for the next payroll run. Increasing a leave entitlement immediately increases the employee’s available balance; it does not erase or recalculate leave already used under the old entitlement.
Step 2: Personal Info #
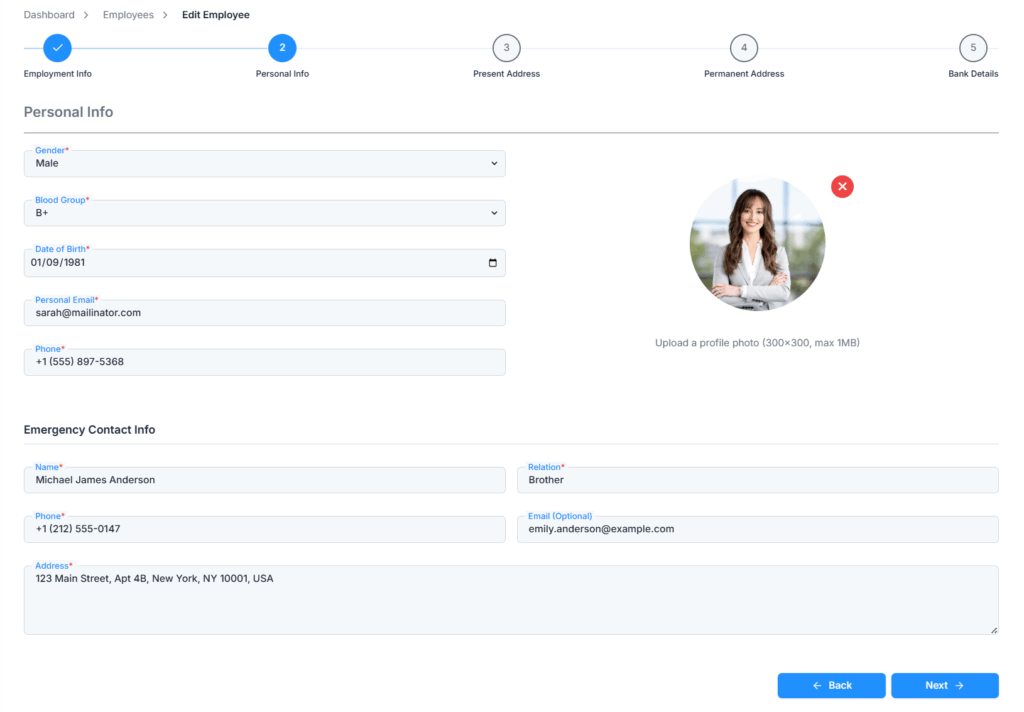
Pre-filled fields:
- Gender
- Blood Group
- Date of Birth
- Personal Email
- Phone
- Profile Photo
- Emergency Contact Name, Relation, Phone, Email, and Address
→ Profile Photo
If the employee already has a photo, it’s shown as the current image — replacing it works exactly like Add Employee: JPG or PNG only, maximum 1 MB, recommended size 300×300. Selecting a new image opens the same cropper (crop, zoom, cancel, apply) before it replaces the existing photo.
Step 3: Present Address #
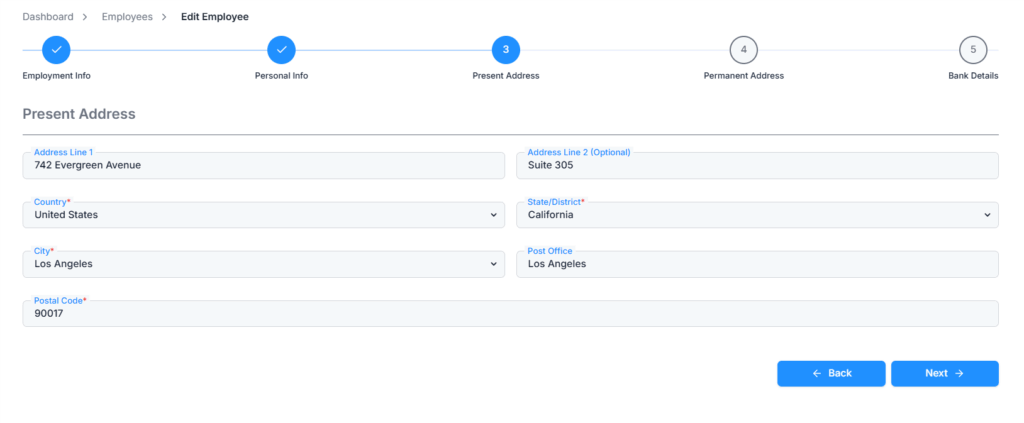
Pre-filled fields:
- Address Line 1 and Address Line 2
- Country
- State / District
- City
- Post Office
- Postal Code
The same dependent selection flow applies as in Add Employee — State/District only becomes available once Country is picked, and City only becomes available once State/District is picked.
Step 4: Permanent Address #
Same fields as Present Address, pre-filled with the employee’s current permanent address.
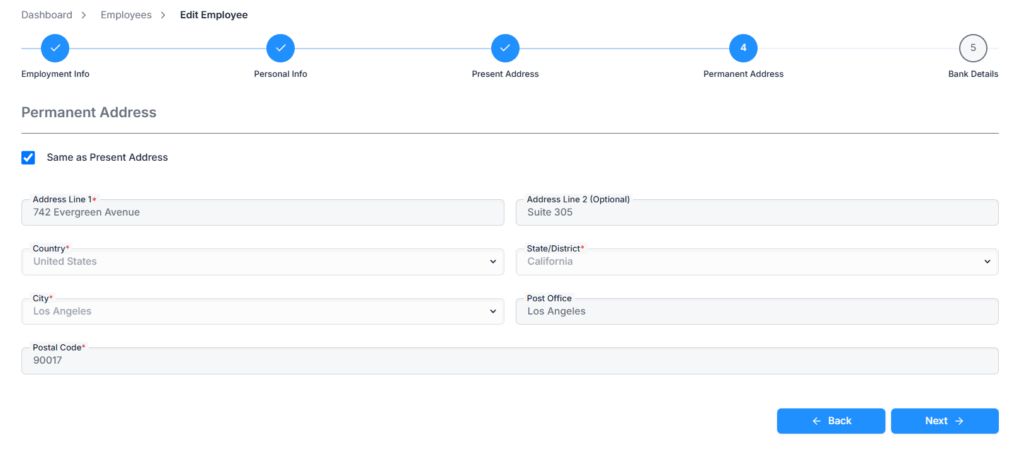
Selecting Same as Present Address copies whatever is currently in the Present Address fields (including any changes you just made on Step 3) into Permanent Address, and locks those fields while it’s checked.
Step 5: Bank Details #
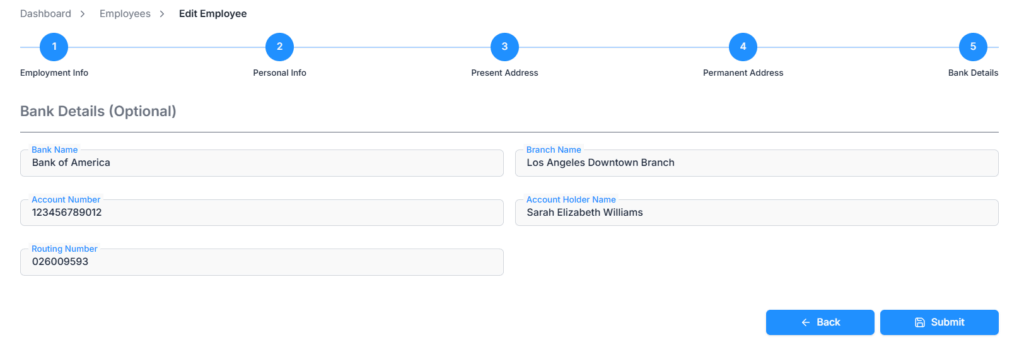
Pre-filled fields:
- Bank Name
- Branch Name
- Account Number
- Account Holder Name
- Routing Number
All bank fields remain optional. You can clear them out, leave them as they are, or fill them in for the first time; nothing here is required.
Duplicate check: an edited Employee ID or email can’t collide with another employee’s — both are checked as you make changes, and email is also re-verified when you save. Phone number is not checked for duplicates; employees can share the same phone number.
Cancel and Navigation #
Cancel discards anything you’ve entered and returns you to the Employees list — there’s no separate Reset button in Edit, since simply returning to Step 1 already pulls the employee’s saved data back in fresh.
On successful save (Step 5), you’ll see “Employee updated successfully,” and you’re taken back to the Employees list — not the employee’s profile page, regardless of whether you started editing from the row menu or from the profile page itself.
Summary #
The Edit Employee page walks through the same 5 steps as Add Employee — Employment Info, Personal Info, Present Address, Permanent Address, and Bank Details — pre-filled with the employee’s current data. It’s only available to the Subscriber Admin or someone holding Edit Employee (For All), and only for employees who currently have a license. Employment Status always stays out of this form, handled instead by the dedicated Change Status action; changes to Pay Type, Overtime, and Lieu Leave apply from the next payroll run onward, while Benefits and Leave Entitlement changes take effect immediately.