
Keep track of company holidays easily
The Holidays Calendar module allows your organization to plan, view, and manage all company holidays throughout the year — including multi-day holidays, not just single dates. Employees and admins can quickly see upcoming holidays and prepare work schedules accordingly.
Who Can Use This Feature #
Subscriber Admin can always view, add, edit, and delete holidays, without needing any specific permission.
Employees can access this page and act on holidays only to the extent they hold the permission actions below.
Permission Behavior
Holiday actions are permission-controlled from: Admin → Permission → Holiday → Manage Holidays
Permission-based access includes:
- View Holidays: Required just to open the Holidays Calendar page at all — without it (and without being the Subscriber Admin), the page shows “Access Denied.”
- Add Holiday: Allows users to create a new holiday. Without this, the calendar isn’t even clickable — dates don’t respond to clicks and the Add Holidays button doesn’t appear at all — so a View-only user can look but not touch.
- Edit Holiday: Allows users to update an existing holiday’s title.
- Delete Holiday: Allows users to remove a holiday.
Calendar View #
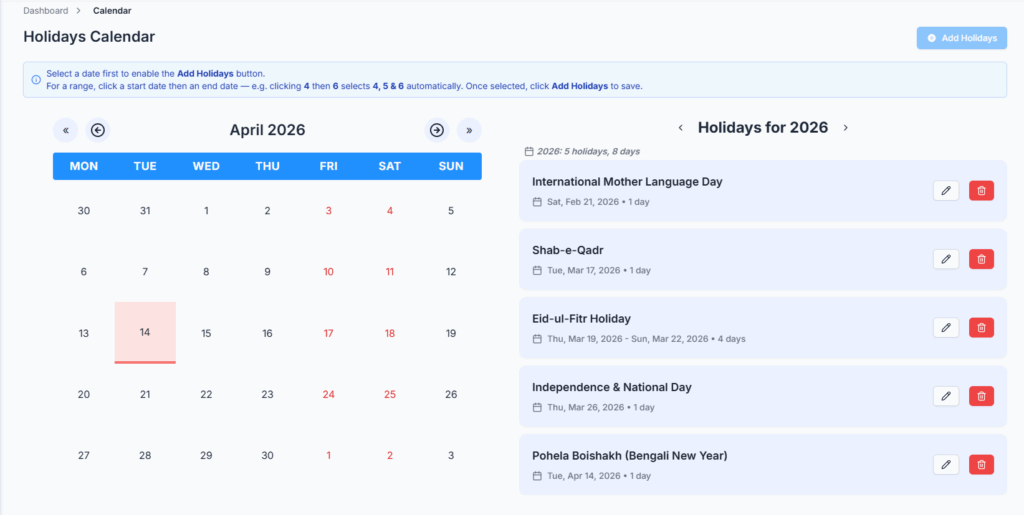
- Left Side – Month Calendar
- Displays the current month at a glance, with today and weekends (Friday & Saturday) both subtly highlighted so you can orient yourself quickly.
- Holidays in the month are highlighted — every day within a multi-day holiday is highlighted, not just its start date.
- Hover over a highlighted date to view that holiday’s title.
- Right Side – Yearly Holiday List
- Opens on the current year by default, but you can step to any previous or future year using the ‹ and › arrows above the list.
- Shows every holiday in the year you’re viewing, each with its date range and how many days it spans (e.g. “3 days”).
- Gives you a running total for that year — how many holidays and how many total days off they add up to.
Manage Holidays #
To manage holidays, select a date (or a date range) on the calendar and use the available actions:
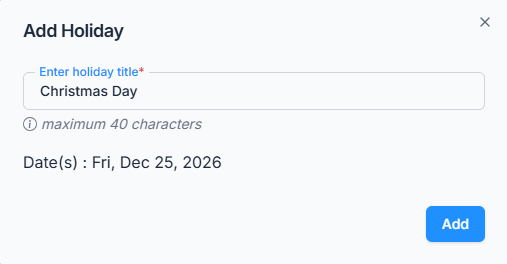
- Add Holiday: Click a date to select it, then click Add Holidays — the button only becomes active once a date is selected. For a holiday that spans several days, click the start date and then the end date; every day in between is selected automatically (e.g. clicking 4 then 6 selects 4, 5, and 6). Enter a title (up to 39 characters) and click Add. The calendar won’t let you select a date that’s already part of another holiday, and if any date in a new range would overlap an existing holiday, the whole selection is rejected.
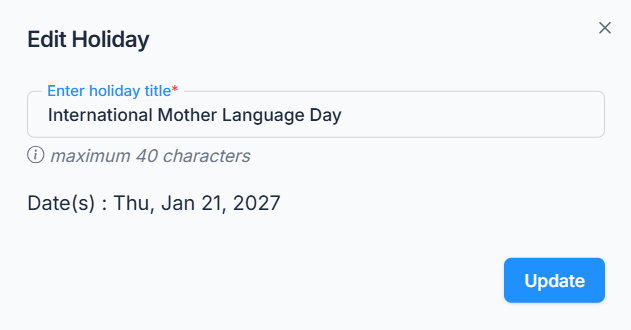
- Edit Holiday – Click the pencil icon next to a holiday in the yearly list to change its title. Note: only the title can be changed this way — the date range is set when the holiday is first added and can’t be edited afterward. If the dates need to change, delete the holiday and add it again with the correct dates.
- Delete Holiday – Click the trash icon next to a holiday in the yearly list, then confirm in the popup. This can’t be undone.
All actions are permission-controlled, so only admins and permitted employees can add, edit, or delete holidays.
This ensures the holiday calendar is always accurate, reflecting company-wide days off for employees and management.
Why It Matters #
- Employees can plan leaves and work schedules efficiently.
- Prevents conflicts with holidays while scheduling tasks or meetings.
- Provides admins with a centralized place to manage all company holidays.
In Short #
The Holidays Calendar keeps everyone on the same page — easy to view, add (single days or multi-day ranges), and manage all holidays for the year, making office planning simple and transparent.