
Set up your company and start managing your office operations efficiently in just a few simple steps.
Office-X helps you simplify and centralize your daily business management, from tracking assets and monitoring employee performance to managing shifts, attendance, and internal communication.
This guide walks you through registering your company, choosing the right plan, and setting up your workspace, so your team can start working productively in no time.
Register Your Company #
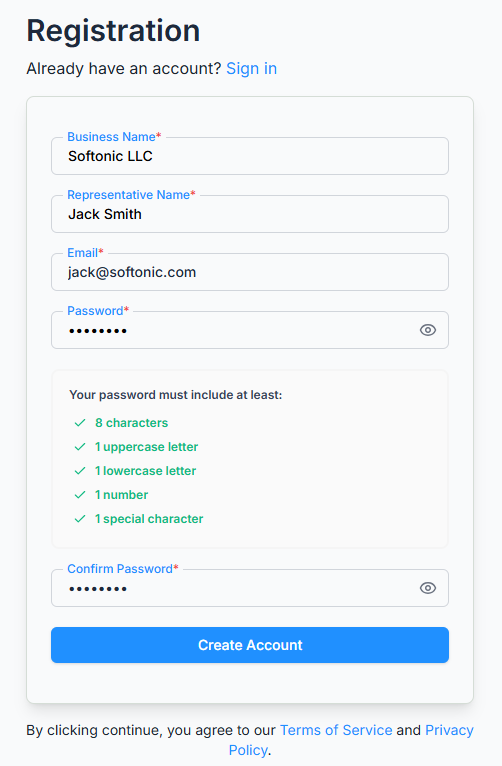
- Go to the Office-X registration page.
- Enter your business name, representative’s name, and business email address. (The representative is your primary administrator — the first account that manages the company.)
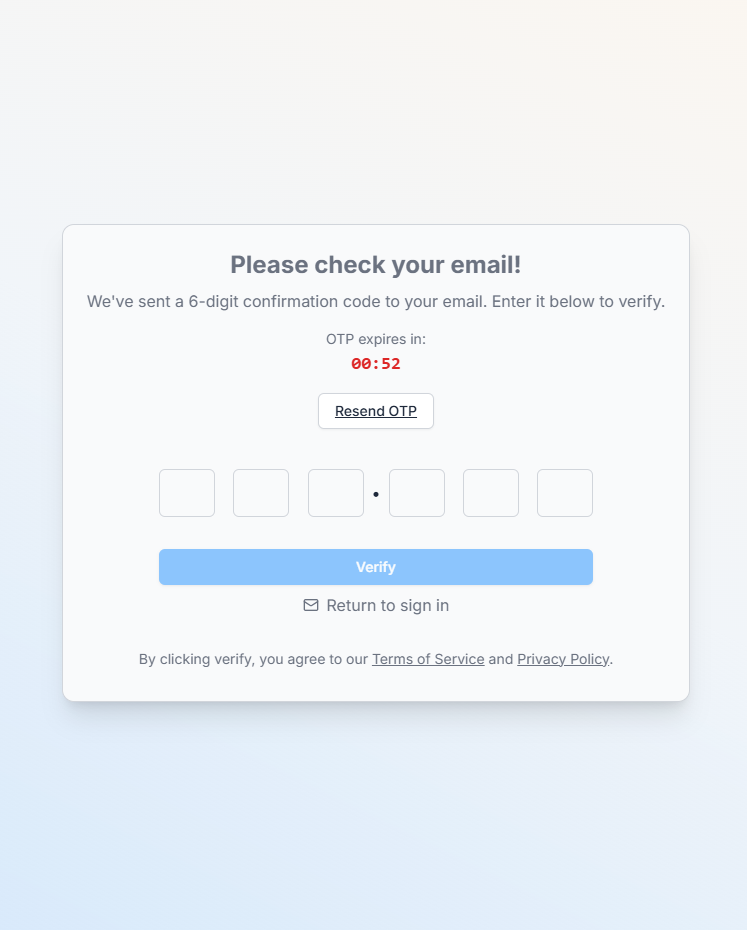
- Verify your email to activate your account.
- Once verified, you’ll be able to choose a plan.
Didn’t receive the verification email? use the resend option on the verification screen.
Choose Your Business Plan #
Next, select the plan and country that fit your company’s needs. Higher plans unlock more features and modules, and the available plans and features may vary by country. Pricing adjusts automatically based on your region.
After selecting your plan, complete the secure payment through Stripe.
Setting Up Your Account #
After your payment is confirmed, Office-X automatically prepares your workspace. It:
- Processes your payment
- Creates your company workspace
- Sets up default data and configurations
- Finalizes plan activation
Once setup is complete, your company is ready for operation, starting with one active seat for your representative.
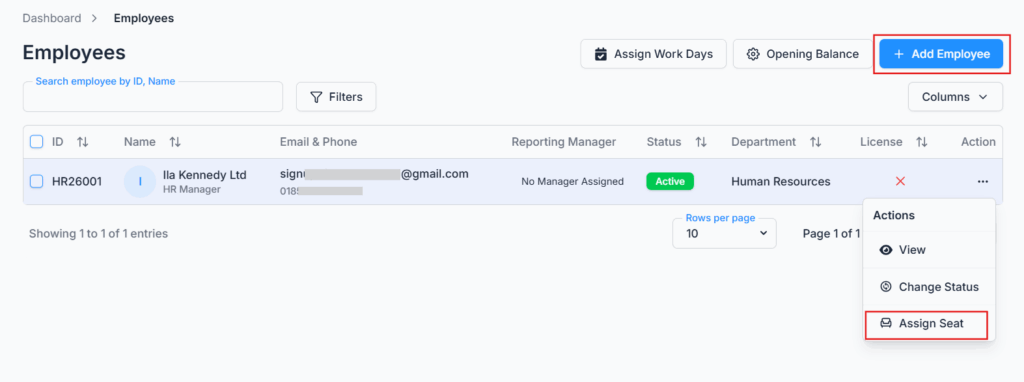
Add Employees and Assign Seats #
Expand your team by adding employees through your company dashboard.
- Employees can be added anytime, so your company can scale gradually.
- Each employee needs an assigned seat licence to log in and use the system’s modules.
- Purchase and assign seats as your team grows.
You’re All Set! #
Your Office-X workspace is ready to use. Start managing your assets, tracking attendance, organizing shifts, and streamlining communication — all in one place.
What’s Next?
- Add your departments, designations, and employees.
- Set up work schedules and attendance.
- Organize shifts and assign team members.
- Explore the other modules available on your plan.